Unlocking The Majesty: Your Ultimate Elephant Drawing Guide
Elephants, with their immense size, gentle demeanor, and profound intelligence, have captivated human imagination for centuries. They are the largest animals that live on land, with only certain whales and sharks being larger in the animal kingdom. This inherent majesty makes them an incredibly compelling subject for artists of all levels. If you've ever dreamt of bringing these magnificent creatures to life on paper, you're in the right place. This comprehensive guide will walk you through everything you need to know about elephant drawing, from basic shapes to intricate details, ensuring you can create stunning renditions of these beloved giants.
Whether you're a budding artist just starting your journey or an experienced illustrator looking to refine your skills, learning how to draw an elephant offers a rewarding creative challenge. We'll explore various approaches, from simple cartoon styles perfect for beginners and children to more realistic portrayals that delve into the complex anatomy of these incredible animals. Prepare to embark on a creative adventure that will not only enhance your drawing abilities but also deepen your appreciation for elephants.
Table of Contents
- The Allure of Elephant Drawing: Why These Gentle Giants?
- Essential Tools for Your Elephant Drawing Journey
- Understanding Elephant Anatomy: The Foundation of Realism
- How to Draw an Elephant: Step-by-Step Guides for Every Skill Level
- Adding Life to Your Elephant: Texture, Shading, and Color
- Common Challenges and How to Overcome Them in Elephant Drawing
- The Joy of Practice: Improving Your Elephant Drawing Skills
- Beyond the Basics: Customizing Your Elephant Art
The Allure of Elephant Drawing: Why These Gentle Giants?
Elephants are undeniably one of the most majestic and recognizable animals on Earth, making them an excellent subject for artists looking to improve their drawing skills. Their unique physical attributes – the long, prehensile trunk, the enormous ears, the sturdy legs, and often, impressive tusks – offer a wealth of interesting features to capture on paper. Beyond their physical grandeur, elephants are also known for their complex social structures, intelligence, and emotional depth, which can inspire artists to imbue their drawings with personality and narrative.
There are two primary species of elephant: the African elephant, known for its larger size and enormous, fan-shaped ears, and the smaller Asiatic elephant, which has rounder ears and a more arched back. Understanding these subtle differences can add authenticity to your elephant drawing, allowing you to choose which species you wish to portray. Whether you're aiming for a powerful, realistic depiction or a charming, whimsical cartoon, the sheer variety of expressions and poses an elephant can strike provides endless creative possibilities.
Essential Tools for Your Elephant Drawing Journey
Before you dive into the specifics of how to draw an elephant, it's helpful to gather a few basic drawing tools. You don't need anything elaborate to start; simplicity is often key for beginners. Here’s what you’ll typically need:
- Pencils: A range of graphite pencils is ideal. An HB pencil is great for initial sketches and light lines, while a 2B or 4B can be used for darker lines and shading. If you're aiming for a very light, almost invisible sketch, a 2H pencil can be useful.
- Paper: Any good quality drawing paper will do. Smooth paper is excellent for fine details, while slightly textured paper can add character to your shading.
- Eraser: A kneaded eraser is fantastic for lifting graphite without damaging the paper, and a regular plastic eraser is good for sharper corrections.
- Blender (Optional): A blending stump or tortillon can help smooth out shading and create realistic textures, especially for elephant skin. Cotton swabs or even your finger can work in a pinch.
- Reference Images: Crucial for realistic elephant drawing. Find clear photos of elephants in various poses to study their anatomy, proportions, and unique features.
- Coloring Mediums (Optional): If you plan to add color, consider colored pencils, watercolors, or acrylic paints.
Remember, the goal is to feel comfortable with your tools. Don't let the lack of professional equipment deter you. Many incredible drawings have been created with just a simple pencil and paper.
- Securely Connect Remote Iot Vpc Raspberry Pi Download Windows
- Buscar Kid
- Pining For Kim Tailblazer
- Mydesinetcom
- Mafia Boss Necati Arabaci
Understanding Elephant Anatomy: The Foundation of Realism
Drawing an elephant involves understanding its distinct anatomy and proportions. Even if you're aiming for a cartoon style, having a basic grasp of their skeletal structure and muscle groups will make your drawing more convincing and dynamic. Elephants are massive creatures, and their weight is distributed uniquely, influencing their posture and movement.
Starting with Basic Shapes: The Elephant's Blueprint
When you’re learning how to draw an elephant, we recommend you start slow. This means drawing the elephant’s body one step at a time, beginning with simple geometric shapes. This approach breaks down a complex subject into manageable parts. Think of the elephant's body as a series of interconnected forms:
- The main body can be represented by a large oval or two overlapping circles (one for the chest, one for the rump).
- The head can be another, smaller oval or circle.
- The legs are thick cylinders or rectangular blocks.
- The trunk is a long, flexible tube.
By starting with these fundamental shapes, you establish the overall pose and proportions before getting bogged down in details. This makes for a good lesson because all the shapes are all pretty simple, but there are a few more details added that make a lot of difference. For instance, the back leg is larger than the front, so the hip line goes further into the body, a subtle detail that adds realism.
Proportions and Distinct Features: Trunk, Ears, and Tusks
Once your basic shapes are in place, you can begin to refine the proportions and add the elephant's most recognizable features. The trunk is arguably the most challenging part for many beginners. It's incredibly flexible and expressive. Start with a simple curve extending from the face, gradually thickening towards the base. The ears are another defining feature; large ears are key to making a cute elephant or a majestic African one. Pay attention to their size relative to the head and how they attach.
Tusks, present in many elephants (especially African males), emerge from the upper jaw and curve outwards. Their size and shape vary greatly. When drawing, consider the angle and length of the tusks to convey the elephant's age and character. Remember, you don’t always have to draw the entire elephant; sometimes, just drawing the elephant’s face with its expressive eyes, trunk, and ears can be incredibly impactful.
How to Draw an Elephant: Step-by-Step Guides for Every Skill Level
This tutorial is great for beginner artists (both kids and adults) who want to improve their drawing skills. You can choose between a realistic elephant drawing or a cartoon elephant drawing, depending on your preference. We'll consider the different sizes and shapes contained in the example drawing of the elephant, with new lines in each step often drawn in blue so you can observe the most recent shapes that you should be illustrating.
Drawing an Easy Elephant for Beginners (Cartoon Style)
For those just starting, learning how to draw a cute and cartoon elephant with 9 simple steps and a directed drawing printable is an excellent way to build confidence. This approach simplifies the complex features into more manageable, rounded shapes.
Here’s a simplified path to draw an elephant easy and step by step:
- Start with a large oval for the body. This will be the main mass.
- Add a smaller, slightly angled oval for the head. Connect it to the body with a short neck line.
- Sketch two large, rounded shapes for the ears. Make them big and floppy, as large ears are key to making a cute elephant.
- Draw the trunk. Begin with a curved line extending from the face, tapering slightly towards the end. Think of it as a flexible tube.
- Add the legs. Draw four sturdy, column-like legs. For a cartoon, they can be quite thick and simple. Remember, the back leg is often larger than the front, so the hip line goes further into the body.
- Include a small, thin tail. A simple curved line with a tuft at the end.
- Refine the outline. Smooth out your initial shapes, connecting them with confident lines.
- Add facial features. Two small dots for eyes, and a couple of lines at the end of the trunk for the nostrils.
- Erase guide lines. Clean up your drawing, leaving only the desired outline.
This very simple and easy elephant to draw for beginners allows you to quickly achieve a recognizable and charming result. You can follow the first couple of tutorials on this page to draw an easy elephant.
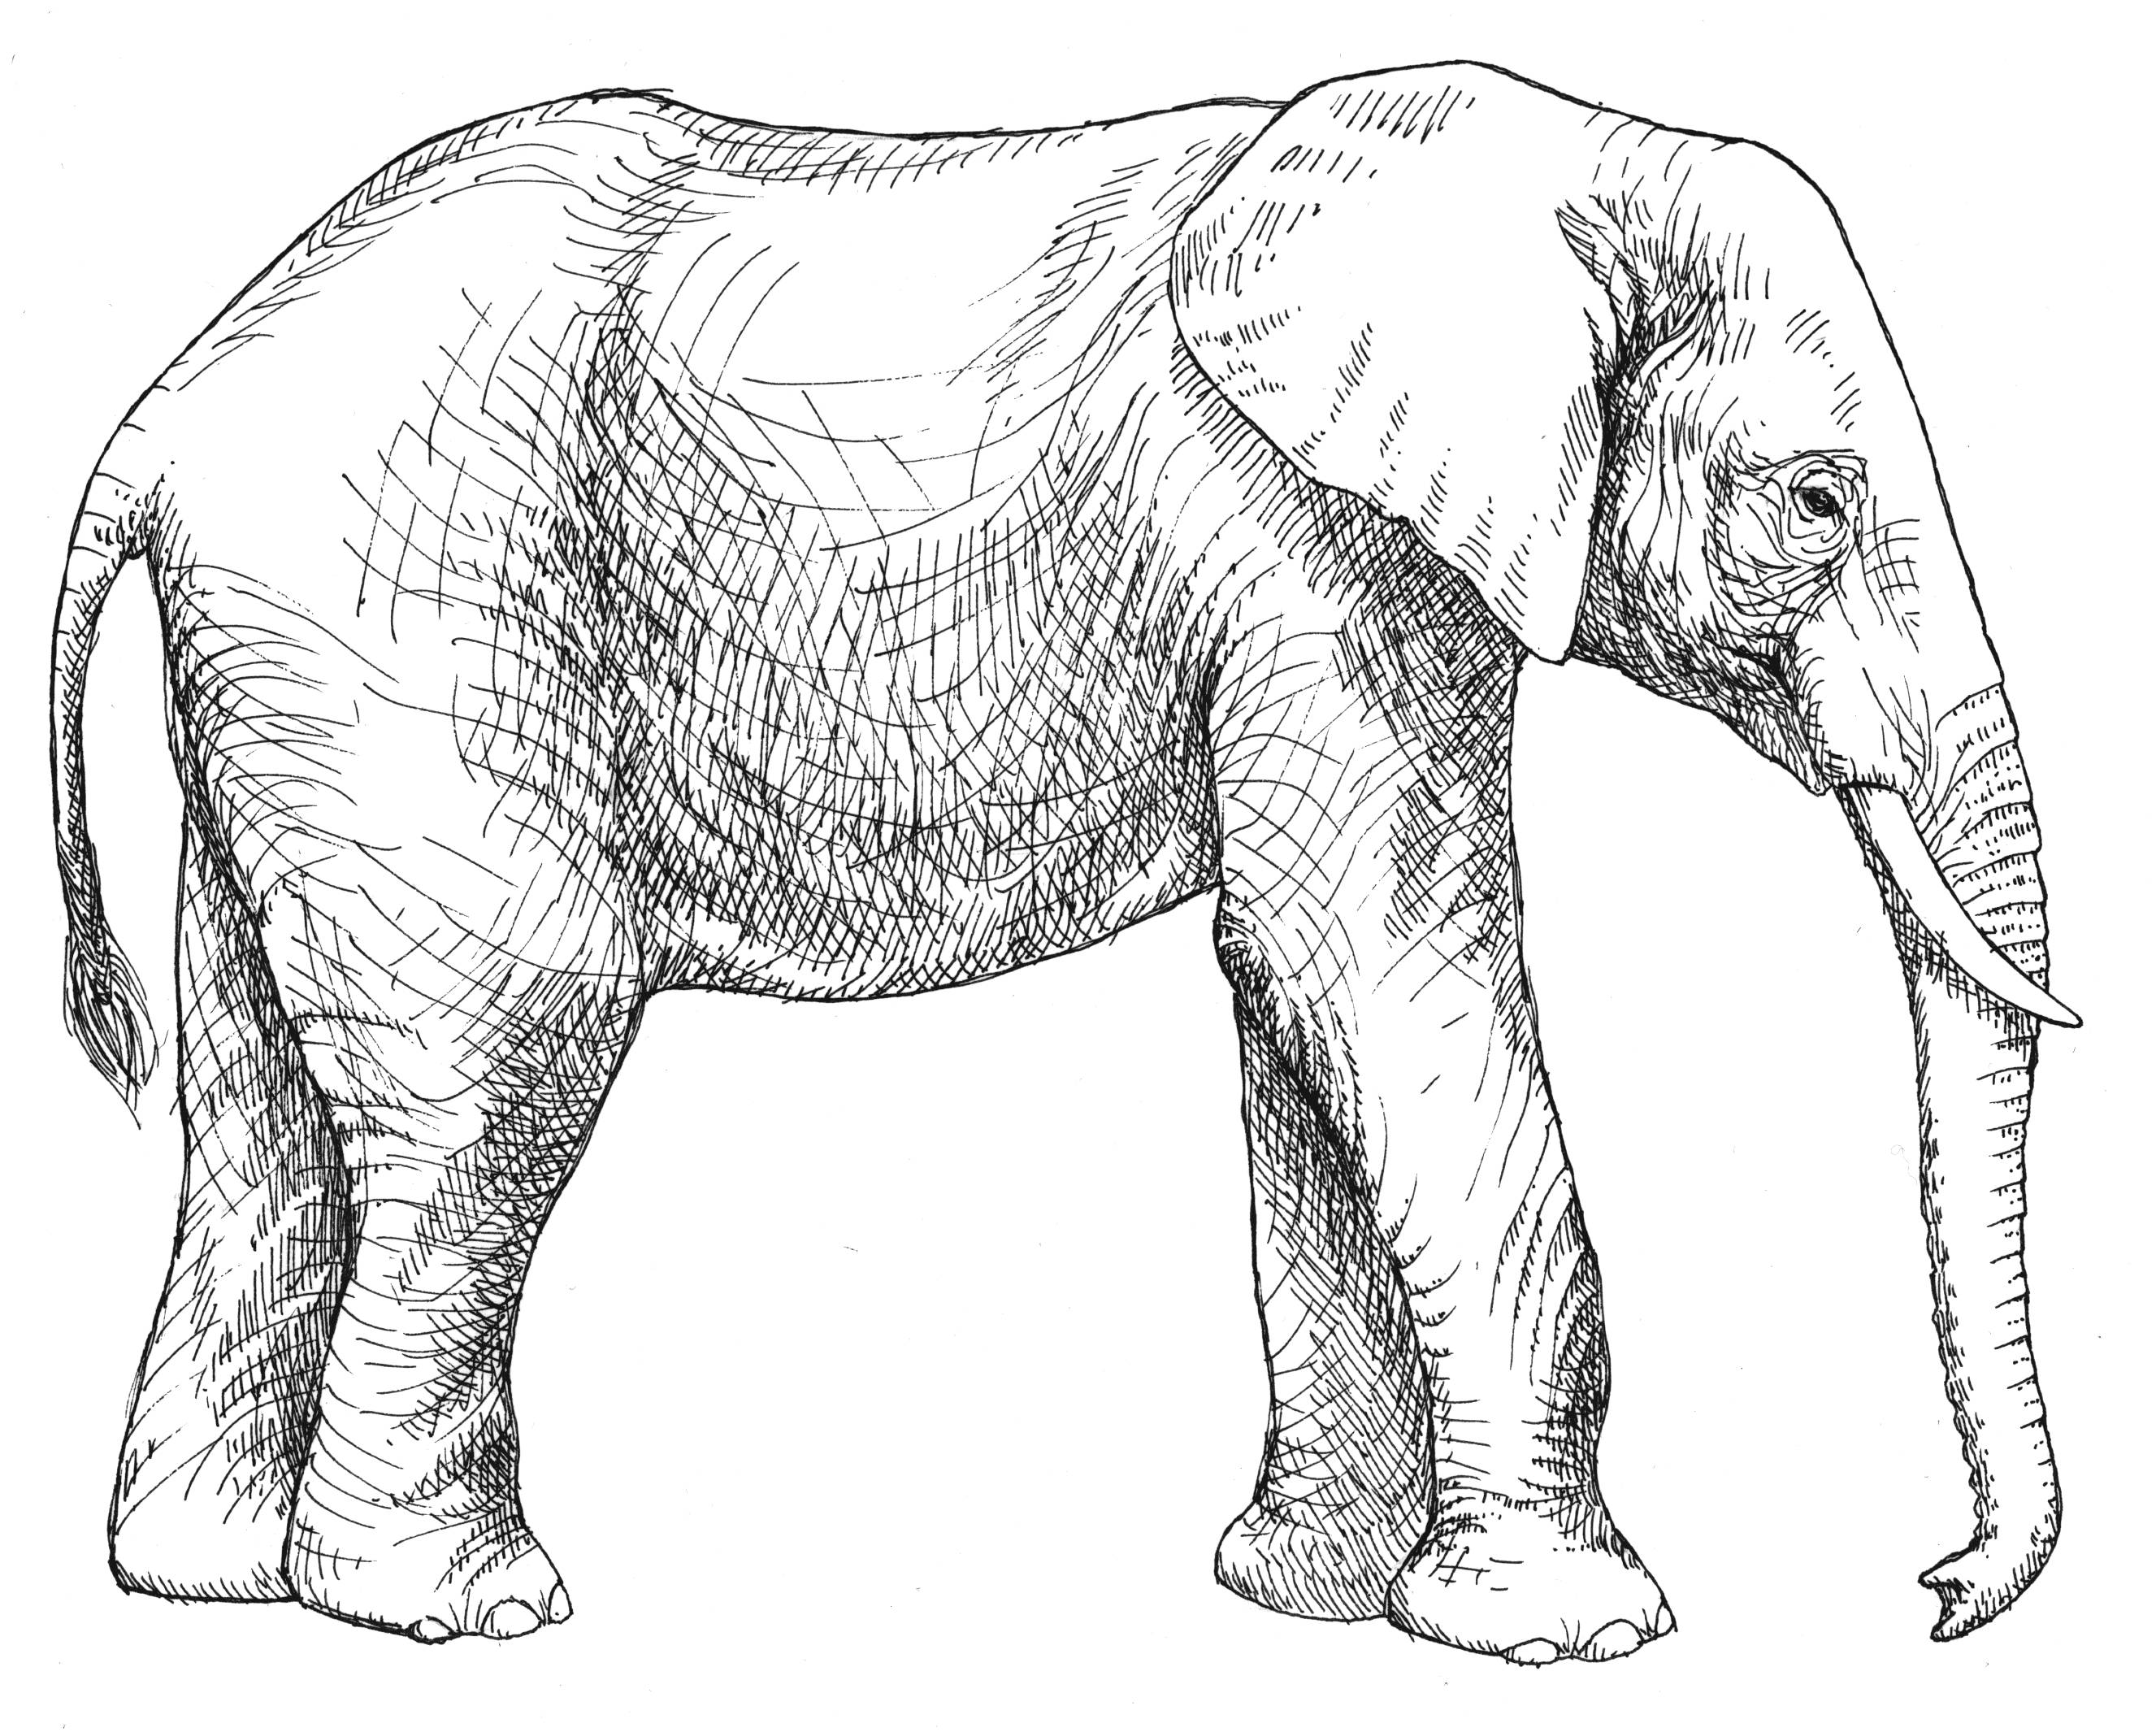
Mastering the Realistic Elephant Drawing (Detailed Approach)
If you're ready for a challenge and want to learn how to draw a realistic African elephant from scratch, this easy tutorial will guide you through the intricacies. This is how you draw a hard elephant, by following the last three tutorials on this page. With this guide, you can surely draw and color an elephant along with its complex features and elaborate details in no time.
Here's a more detailed approach, following 16 steps to draw the body, head, trunk, tusks, ears, legs, and tail:
- Sketch the Pose: Start with very light lines to establish the overall gesture and balance of the elephant. Think about its spine and the general direction of its movement.
- Rough in the Skeleton/Basic Forms: Use simple geometric shapes (circles, ovals, cylinders) to block out the major masses of the body, head, and limbs. Pay close attention to proportions.
- Refine the Body Shape: Connect the basic forms to create the elephant's robust torso. Note the gentle curve of the back and the rounded belly.
- Draw the Head and Trunk: The head is a complex shape. Start with the cranium, then extend the trunk, ensuring it flows naturally from the face. Remember the trunk's flexibility and the rings of muscle.
- Form the Ears: African elephants have large, distinctive ears. Sketch their general shape and how they attach to the head.
- Outline the Legs: Build upon your cylindrical guides, giving the legs their characteristic thick, columnar appearance. Ensure they are grounded and support the elephant's weight.
- Add the Feet: Elephants have large, padded feet. Sketch their round shape and the visible toenails.
- Draw the Tusks (if applicable): If your elephant has tusks, sketch their curve and point of emergence.
- Connect the Tail: A relatively thin tail with a tuft of hair at the end.
- Refine the Overall Silhouette: Go over your sketch with slightly firmer lines, cleaning up any wobbly or unnecessary marks.
- Add Skin Texture: Elephant skin is wrinkled and rough. Use short, irregular lines and subtle shading to suggest this texture, especially around joints and folds.
- Detail the Face: Add the small, intelligent eyes, the folds around them, and the nostrils at the end of the trunk.
- Shading for Form: Begin to add basic shading to give your elephant drawing depth and volume. Identify your light source and shade accordingly.
- Refine Shading and Details: Build up layers of shading to create a realistic sense of form and texture. Pay attention to highlights and shadows.
- Add Cast Shadows: A shadow beneath the elephant will ground it on the page and enhance realism.
- Final Touches and Color: Once your drawing is complete, you can add color with paint or pencils, further enhancing its realism or artistic flair.
Now students can easily learn how to draw an elephant for kids with a bit more realism. This makes for a good lesson because all the shapes are all pretty simple, but there are a few more details added that make a lot of difference.
Adding Life to Your Elephant: Texture, Shading, and Color
Once you have the basic form of your elephant drawing down, adding texture, shading, and color can truly bring it to life. Elephant skin is not smooth; it's a tapestry of wrinkles, folds, and rough patches. To convey this:
- Texture: Use a combination of short, overlapping lines and subtle smudging to mimic the rough, leathery texture of their skin. Pay attention to areas like the trunk, around the eyes, and joints where wrinkles are more pronounced.
- Shading: Shading is crucial for giving your elephant drawing three-dimensionality. Observe how light falls on an elephant in your reference image. Use different pencil pressures or charcoal to create a range of tones from light to dark. This will define the contours of the body, the roundness of the legs, and the depth of the ears.
- Color: While elephants are often depicted in shades of grey, their skin can take on hues from brown to reddish depending on the soil they roll in. When adding color with paint or pencils, don't be afraid to experiment with subtle variations. You can also customize its physical attributes and play with various colors as much as you like! While this drawing is more like a cartoon elephant, you can change the facial features and details to make a more realistic elephant drawing like adding tusks to the trunk or shading while coloring.
Remember, the goal is not to draw every single wrinkle but to suggest the texture in a convincing way. Over-detailing can sometimes make a drawing look flat.
Common Challenges and How to Overcome Them in Elephant Drawing
The first time I tried to draw an elephant, my drawing looked like a big grey blob with ears. I was frustrated because I couldn't get the shape right or figure out how to draw the trunk. But I didn't give up. Instead, I looked for simpler ways to break down the drawing into more manageable parts. This experience is common for many aspiring artists. Here are some frequent challenges and how to tackle them:
- Getting the Proportions Right: Elephants are unique in their proportions. Their heads are relatively small compared to their massive bodies, and their legs are thick and straight.
- Solution: Always start with basic shapes and light guidelines. Measure and compare the sizes of different body parts to each other before adding details. Use a grid method if necessary for complex poses.
- Drawing the Trunk: The trunk's flexibility and muscle structure can be daunting.
- Solution: Think of the trunk as a series of interconnected cylinders or segments. Practice drawing it in various positions (curled, extended, holding something) to understand its movement. Add subtle lines to indicate the folds and texture.
- Capturing the Ears: Elephant ears, especially African ones, are large and have a distinct shape. Getting them to look natural can be tricky.
- Solution: Pay attention to how the ear attaches to the head and how it folds. Use curved lines to convey their organic shape and add subtle shading to show their concave form.
- Achieving Realistic Skin Texture: Elephant skin is heavily wrinkled, which can be hard to render without making it look messy.
- Solution: Don't draw every wrinkle. Instead, focus on the major folds and use subtle, irregular lines and stippling (dots) or cross-hatching to suggest texture. Observe where the wrinkles are deepest (e.g., around joints, behind the ears).
Otherwise, getting the shape of the elephant’s back, trunk and ears right on the first try may seem too challenging. Breaking down the drawing into more manageable parts is key to success.
The Joy of Practice: Improving Your Elephant Drawing Skills
Like any skill, drawing an elephant improves with practice. The more you practice, the better your elephant will be. Don't be discouraged if your first few attempts don't look exactly as you envisioned. Every line, every smudge, and every mistake is a learning opportunity.
- Consistent Practice: Dedicate regular time, even short bursts, to drawing. Consistency is more important than long, infrequent sessions.
- Draw from References: Continuously study real elephant photos or videos. Observe their anatomy, how they move, and the nuances of their expressions.
- Experiment with Styles: Try drawing both realistic and cartoon elephants. This helps you understand different approaches to form and simplification. Try our other cute elephant drawing too.
- Focus on Specific Features: If you struggle with the trunk, dedicate a session just to drawing trunks from different angles. If it's the ears, draw only ears.
- Seek Feedback: Share your drawings with trusted friends, fellow artists, or online communities. Constructive criticism can provide valuable insights.
- Embrace Imperfection: Art is a journey, not a destination. Enjoy the process of creation and the unique qualities of your own hand. Take your time and do your best.
Elephants have always been a challenge to draw as a kid, so I hope this free elephant drawing printable helps you learn. This tutorial is designed to help young artists understand and replicate the unique features of an elephant.
Beyond the Basics: Customizing Your Elephant Art
Once you feel comfortable with the fundamental techniques of elephant drawing, the most fun part is, you can customize its physical attributes and play with various colors as much as you like! Experience the majesty and intelligence of elephants with our collection of elephant drawings. From majestic matriarchs to playful young calves, these examples will inspire you to learn how to draw elephants in your own style and capture the unique characteristics and personalities of these incredible animals.
- Different Poses: Don't just draw standing elephants. Try drawing them walking, bathing, trumpeting, or interacting with other elephants.
- Baby Elephants: Drawing a baby elephant (calf) offers a different set of proportions and a lot of cuteness. They have larger heads relative to their bodies and often more playful expressions. We have 2 easy and cute baby elephant drawings with colors to inspire you.
- Expressive Faces: Focus on the eyes and trunk to convey emotion. An elephant's eyes can show wisdom, sadness, or curiosity.
- Adding a Background: Place your elephant in its natural habitat – a savanna, a jungle, or a watering hole. This adds context and narrative to your artwork.
- Stylization: Experiment with different artistic styles beyond realism or simple cartoons. Explore abstract, minimalist, or highly decorative approaches.
Remember, art is about personal expression. While learning the rules is important, breaking them creatively is where true individuality shines. Your elephant drawing is complete when you feel you've captured its essence in a way that resonates with you.
Conclusion
Learning how to draw an elephant is a rewarding artistic endeavor that combines technical skill with an appreciation for one of nature's most magnificent creatures. We've covered everything from gathering your essential tools and understanding basic elephant anatomy to step-by-step guides for both easy cartoon styles and detailed realistic renditions. We've also explored how to add life through texture, shading, and color, and addressed common challenges artists face.
The journey of mastering elephant drawing, like any artistic pursuit, is continuous. It's about consistent practice, keen observation, and the joy of creation. So, pick up your pencils, find some inspiring reference images, and start sketching. Don't be afraid to make mistakes; they are stepping stones to improvement. We encourage you to share your elephant drawings in the comments below – we'd love to see your creations! And for more drawing tips and tutorials, be sure to explore our other easy drawings for kids and adults. Happy drawing!

Elephant Pencil Drawing Print - Wildlife Art - Elephant Decor - African
Simple Line Drawing Elephant at GetDrawings | Free download
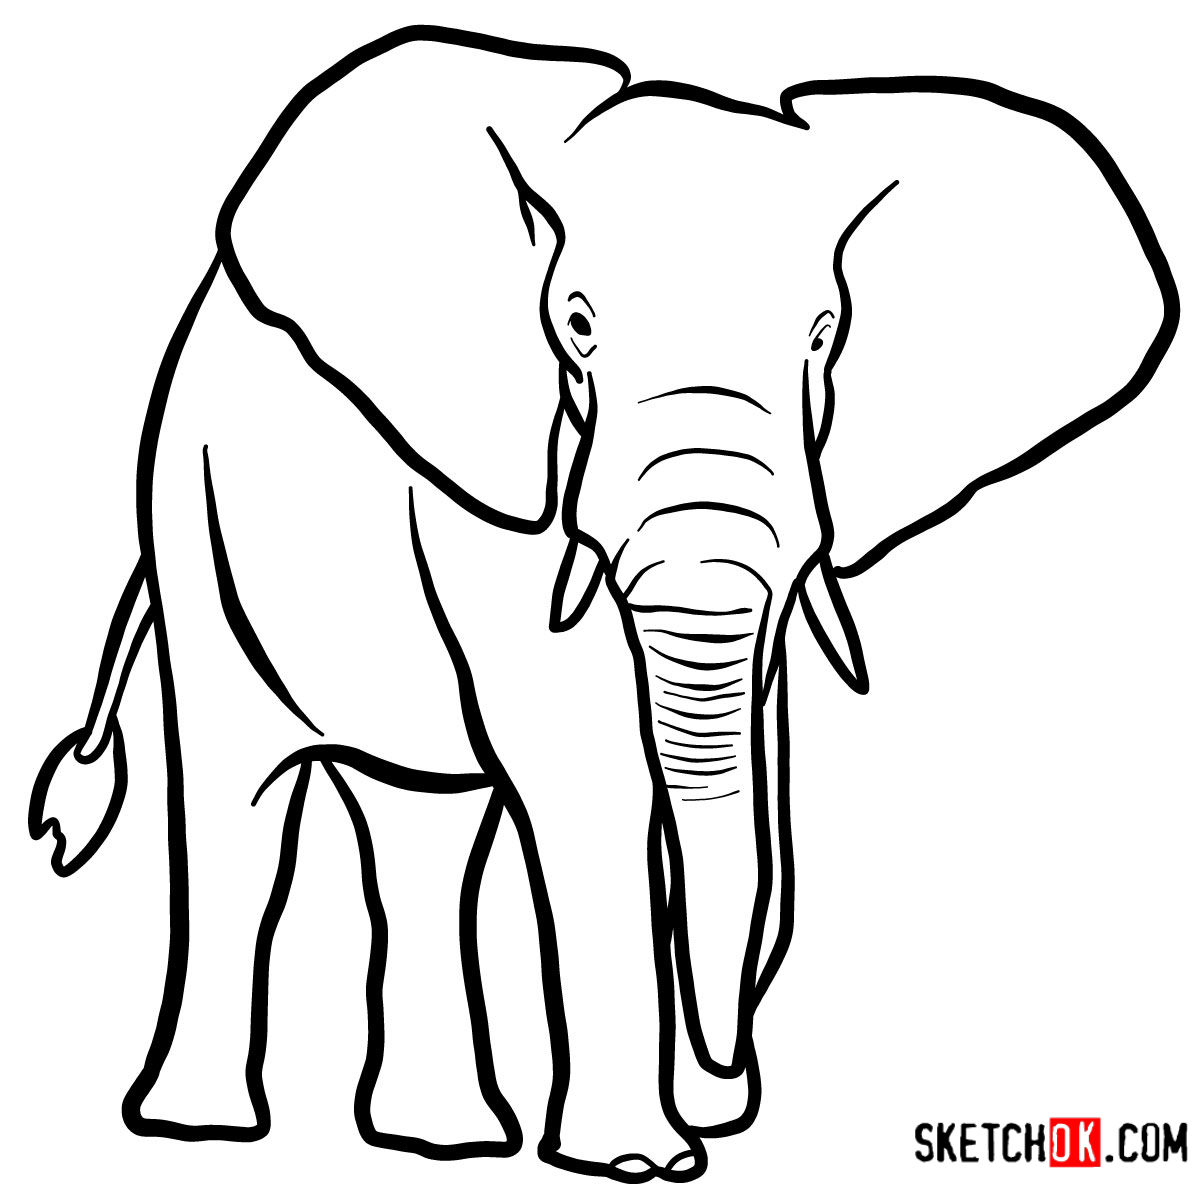
How to draw an Elephant front view | Wild Animals - Sketchok Easy
