Unlocking The Bones: Your Guide To Realistic Skeleton Hand Drawing
Embarking on the journey of skeleton hand drawing is more than just putting pencil to paper; it's an intriguing exploration into human anatomy and artistic expression. Whether you're a budding artist or a seasoned illustrator looking to refine your skills, mastering the intricate structure of the human hand's skeletal system offers a unique challenge and immense satisfaction. This comprehensive guide will walk you through the process, transforming what might seem like a complex puzzle into an accessible and rewarding artistic endeavor.
From the delicate phalanges of the fingertips to the robust carpal bones of the wrist, each element plays a crucial role in the hand's remarkable dexterity. Understanding these components is key to creating a realistic and compelling skeleton hand drawing. Join us as we delve deep into the art and science behind bringing these bony structures to life on your canvas.
Table of Contents
- The Allure of the Skeleton Hand: Why Draw It?
- Anatomy 101: Understanding the Hand's Bony Structure
- Essential Tools for Your Skeleton Hand Drawing Journey
- Breaking It Down: A Step-by-Step Approach to Skeleton Hand Drawing
- Mastering Shading and Pen Details for Realism
- Creative Applications: Beyond the Basic Sketch
- Common Pitfalls and Pro Tips for Aspiring Artists
- The Journey of a Thousand Bones: Personal Reflections on Drawing Skeleton Hands
The Allure of the Skeleton Hand: Why Draw It?
Learning how to draw skeleton hands is far more than just a simple and fun activity; it offers a profoundly interesting perspective into the structure of a hand. Human hands are unique appendages, boasting a prehensile thumb, for example, set at an angle that allows us to grasp objects and expertly operate tools. This intricate design makes the skeleton hand a fascinating subject for artists. A skeleton hand tutorial provides a detailed description of the bone structures of each finger, revealing the underlying mechanics that enable such remarkable dexterity.
Beyond its anatomical significance, the skeleton hand holds a powerful symbolic presence in art and culture. It can represent mortality, the passage of time, or even a connection to the supernatural. This duality makes skeleton hand drawing a versatile subject, allowing artists to explore themes ranging from scientific accuracy to macabre fantasy. It's a fantastic entry point into human anatomy, offering a concrete visual representation of complex biological systems. By understanding the bones, you gain a deeper appreciation for the living hand, enhancing your ability to draw it in any pose or context.
Anatomy 101: Understanding the Hand's Bony Structure
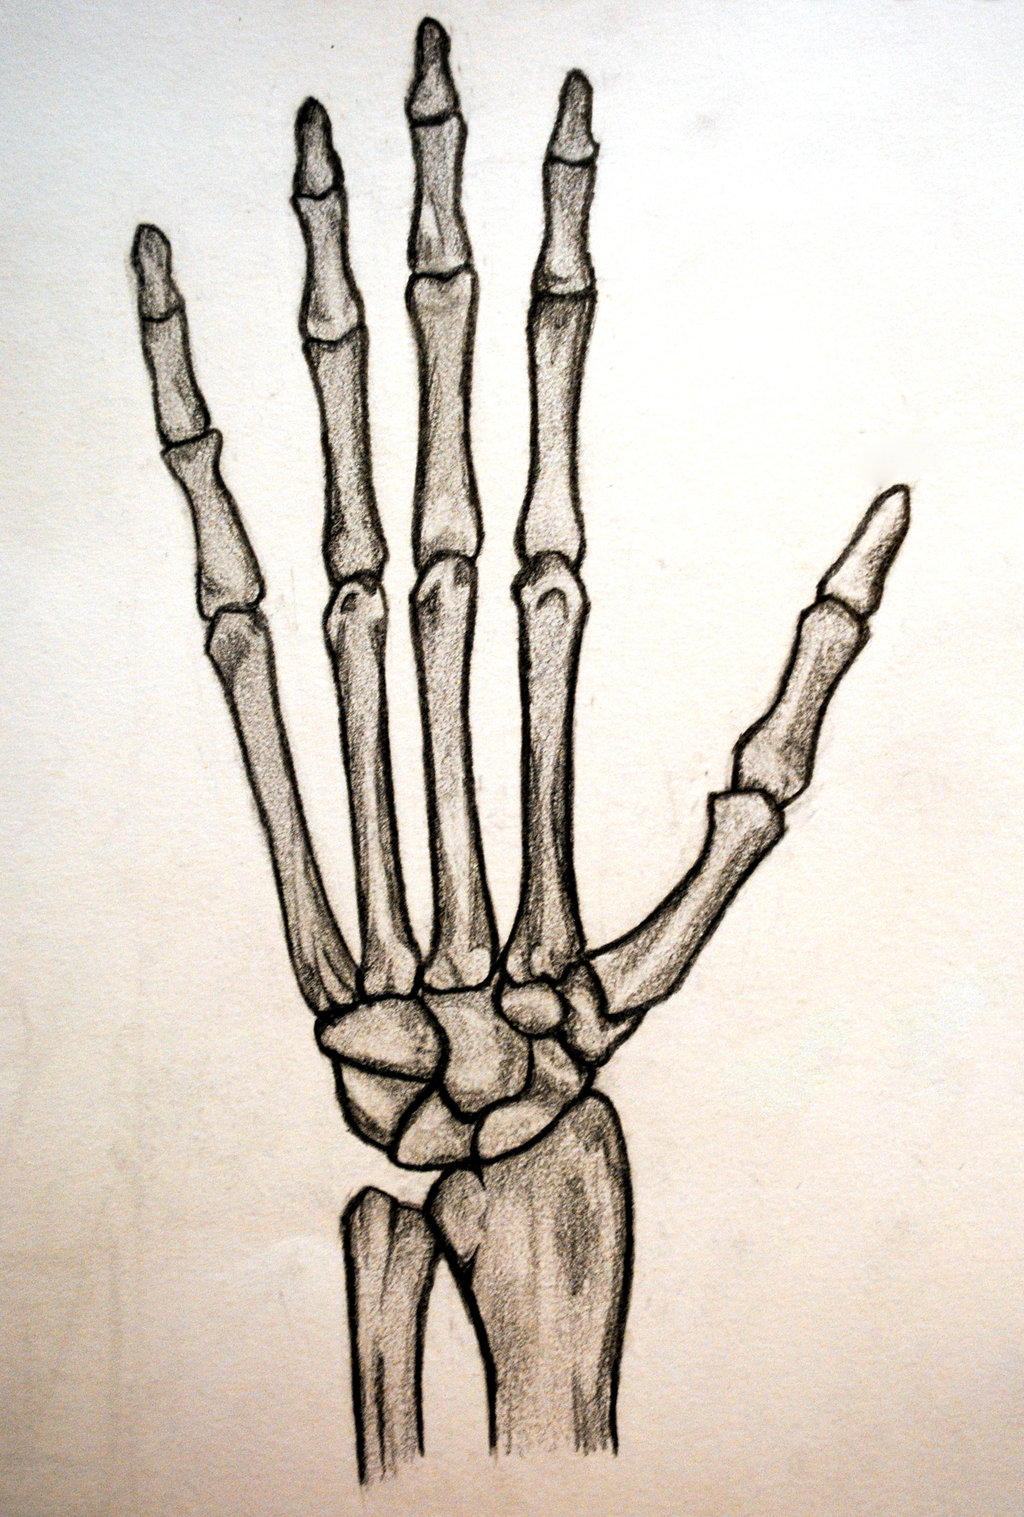
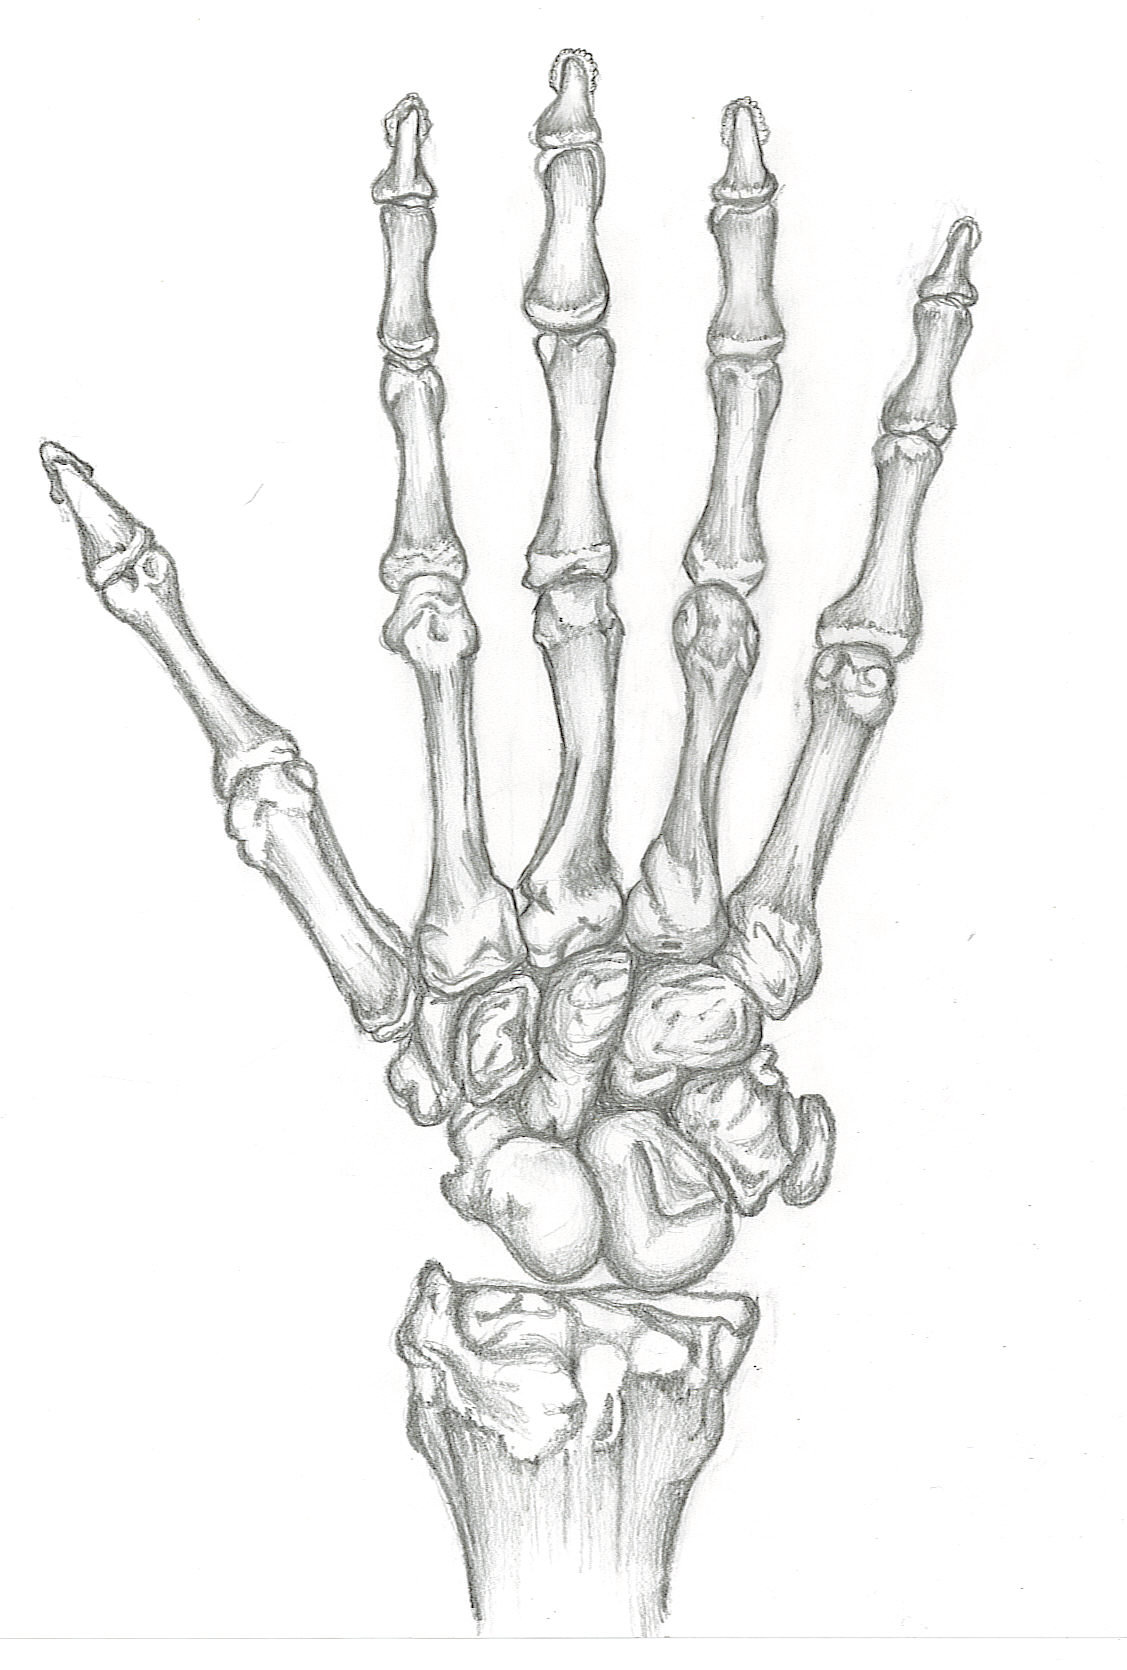
To truly master the art of skeleton hand drawing, a foundational understanding of the hand's anatomy is indispensable. The hand is a marvel of biological engineering, composed of 27 bones (excluding the two sesamoid bones often found in the thumb). These bones are meticulously arranged to provide both strength and flexibility. Breaking the hand down into its primary bone groups will make the drawing process less daunting and more accurate.
The Carpal Bones: Foundation of the Palm
At the base of the hand, forming the wrist, are the eight carpal bones. These small, irregularly shaped bones are arranged in two rows. While they might seem like a jumble, they work together to allow a wide range of motion at the wrist. For drawing purposes, you don't need to meticulously detail each individual carpal bone in a basic skeleton hand drawing, but understanding their collective mass and how they connect to the forearm (radius and ulna) is crucial. They form the sturdy base from which the rest of the hand extends.
- Two Guys One Horse
- Valvoline Coupon 25 Off
- Perdita Weeks Disability
- Bonzycodecom
- Diva Flawless Real Name
Metacarpals: The Palm's Framework
Extending from the carpal bones are the five metacarpal bones, which form the main structure of the palm. Each finger (including the thumb) has its own metacarpal. These are longer, more slender bones compared to the carpals, and they are responsible for the length and breadth of the palm. When you draw the palm bones, these are your primary focus. The metacarpal of the thumb is particularly important as it articulates with the carpal bones in a way that grants the thumb its unique opposable movement, a key feature of human hands.
Phalanges: The Finger Bones
The fingers themselves are composed of phalanges. Each finger, except the thumb, has three phalanges: the proximal phalanx (closest to the palm), the middle phalanx, and the distal phalanx (the fingertip bone). The thumb, being unique, only has two phalanges: a proximal and a distal phalanx. As you get further away from the wrist, make the bones narrower. The distal phalanx (bones in the fingertips) should be rounded at the end, reflecting their role as the very tips of the fingers. Understanding the joints between these phalanges is vital for accurately depicting the natural curvature and articulation of the fingers in your skeleton hand drawing.
Essential Tools for Your Skeleton Hand Drawing Journey
Before you dive into the specifics of a realistic, slow-paced hand skeleton tutorial, gathering the right tools can significantly enhance your experience and the quality of your skeleton hand drawing. You don't need an elaborate art studio, but a few key items will make a world of difference:
- Pencils: A range of graphite pencils (e.g., HB for sketching, 2B-4B for shading, 6B-8B for dark details) will allow you to build up your drawing gradually.
- Erasers: A kneaded eraser is excellent for lifting graphite gently without damaging the paper, and a standard vinyl eraser for precise clean-ups.
- Paper: Smooth drawing paper or Bristol board works well, as it allows for fine details and smooth blending.
- Reference Images: Crucial for anatomical accuracy. Look for high-quality photographs of hand skeletons from various angles. If you have access to an actual hand skeleton model, even better!
- Blending Tools: Tortillons (paper stumps) or cotton swabs can help you achieve smooth shading and transitions.
- Fine-Liner Pens: For outlining and adding crisp details once your pencil sketch is complete. Your skeleton hand sketch is ready for outlining with a dark medium once the pencil work is solid.
- Optional: A light box can be helpful for tracing initial outlines from reference images, and a ruler can assist with initial proportional guidelines.
Remember, the tools are extensions of your hand. Experiment with different brands and types to find what feels most comfortable and effective for your personal drawing style.
Breaking It Down: A Step-by-Step Approach to Skeleton Hand Drawing
Drawing a realistic skeleton hand doesn't have to be intimidating. This easy guide breaks down the hand into basic shapes and bones, making the process manageable, especially for beginners. We will walk you through these steps, ensuring that sketching a skeleton hand won't be as challenging as it first appears. Follow the instructions to sketch the bones in the palm and the fingers, and add shading and pen details.
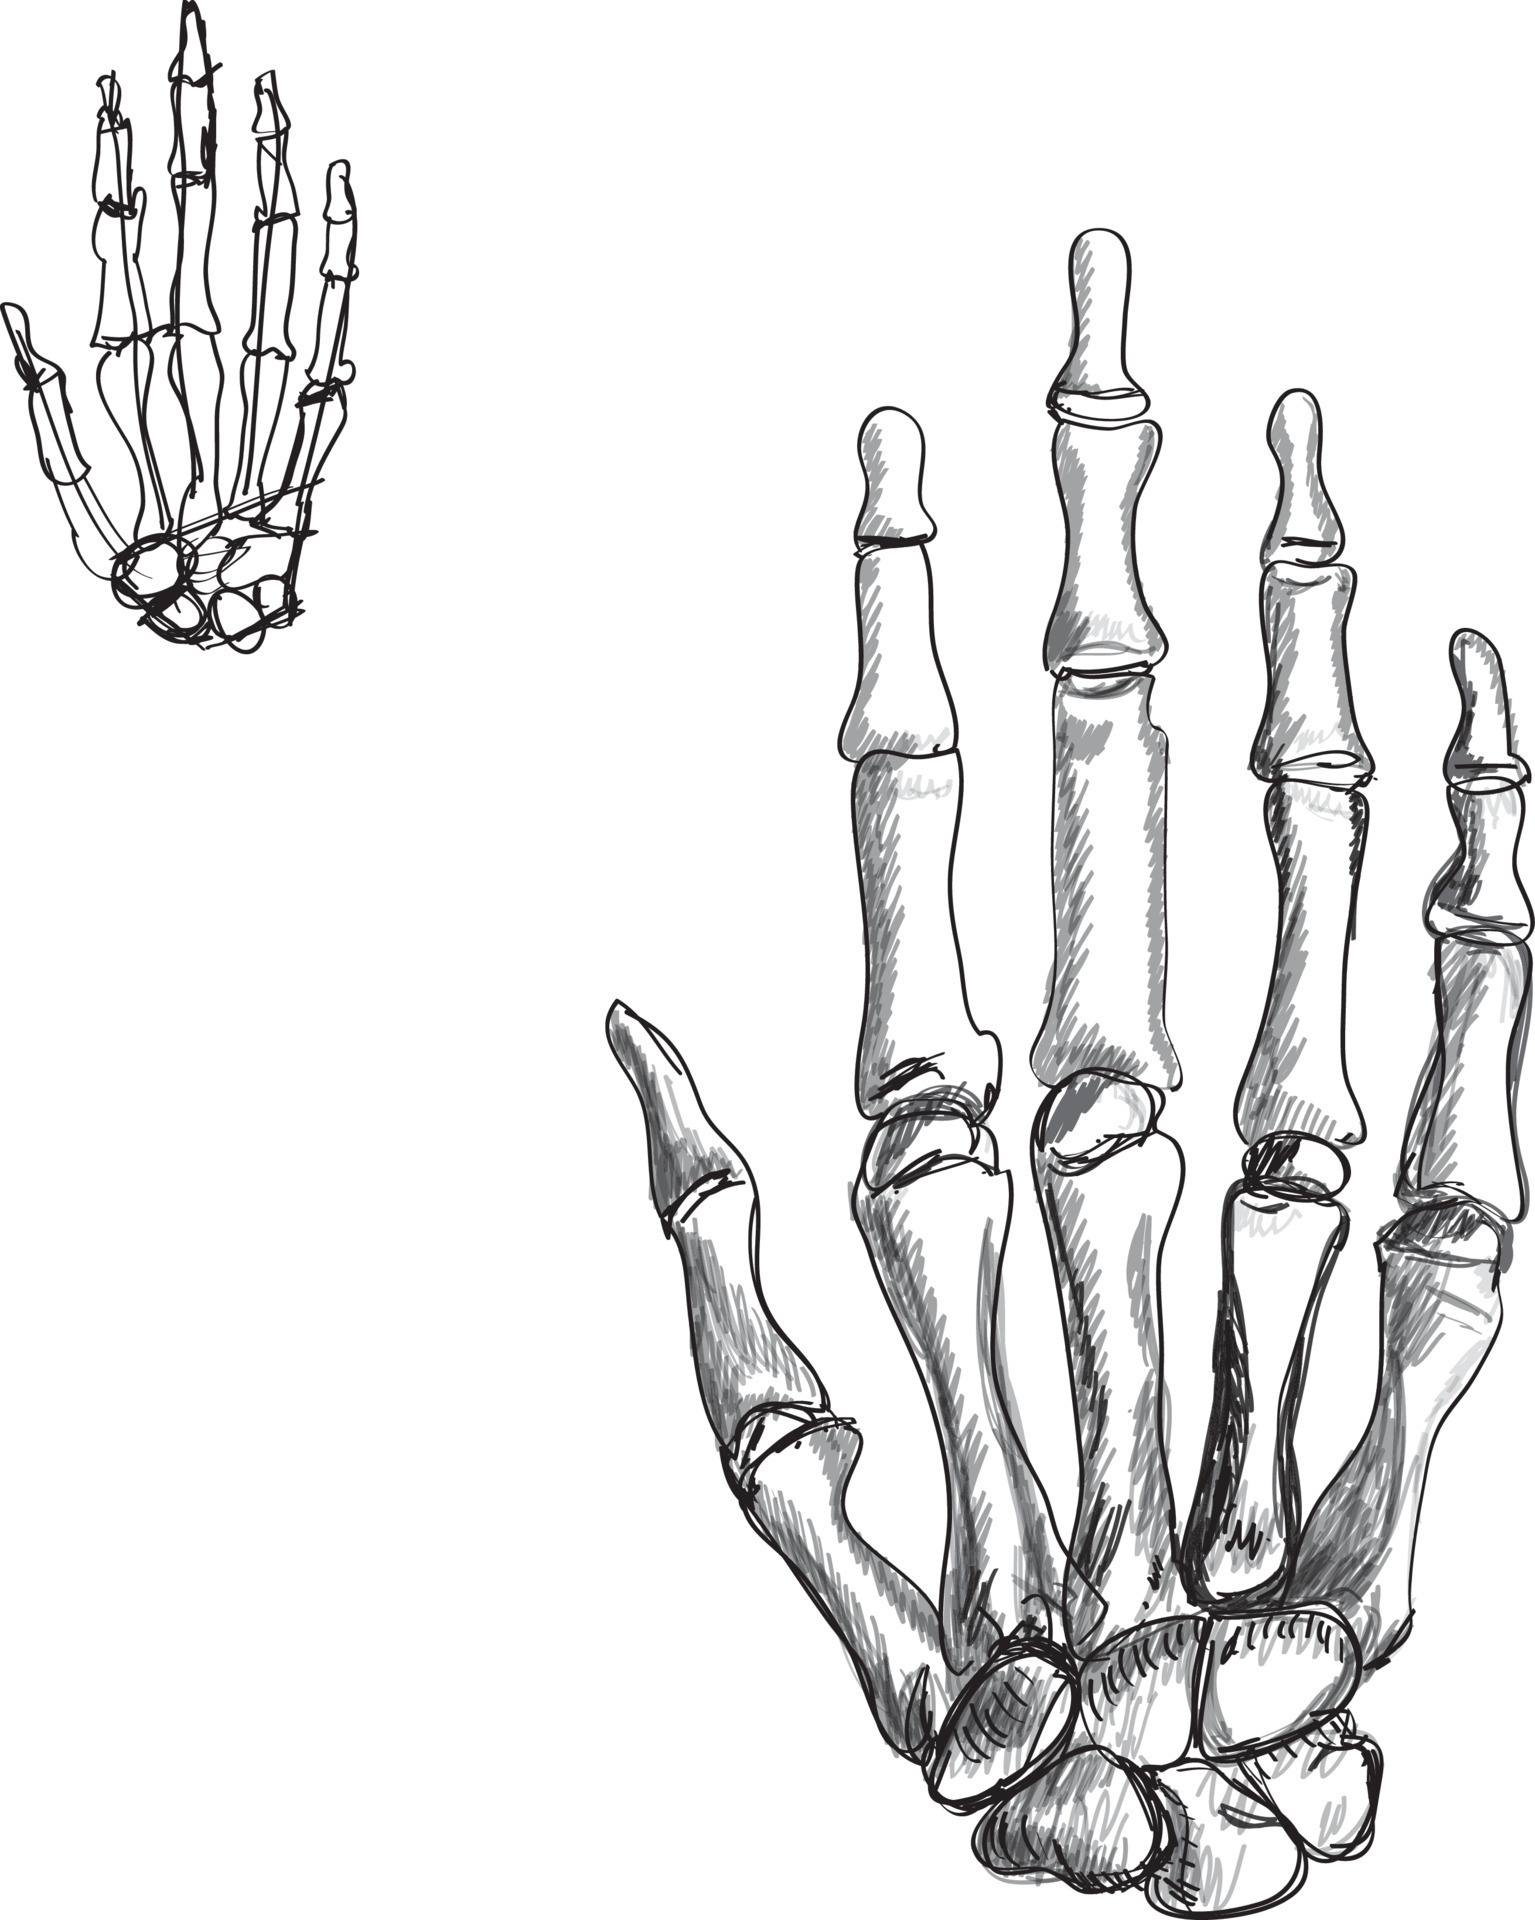
Starting with Basic Shapes: The Foundation
Every complex drawing begins with simple forms. For a skeleton hand, start by lightly sketching the overall shape of the hand. Think of the palm as a slightly tapered rectangle or trapezoid, and the fingers as elongated cylinders. This initial step focuses on proportion and placement. You have two hands, so use your own as a reference for general size and angle, even if you're drawing the bones. Consider the angle at which the hand is positioned – is it open, closed, or reaching out from beneath cracked earth or a grave, as if emerging from the ground?
Lightly mark where the wrist would connect and where the base of each finger begins. Remember that the thumb is set at an angle, so account for its unique position from the start. This foundational sketch is your blueprint, guiding the placement of individual bones. Don't press too hard; these lines are meant to be easily erased or refined later.
Detailing the Bones: From Palm to Fingertips
Once your basic shapes are in place, it's time to draw the palm bones (metacarpals) and then draw the finger bones (phalanges). Follow the reference images and pencil sketches to create a realistic and detailed bone hand drawing. A skeleton hand tutorial will often emphasize a slow-paced approach, which is ideal here.
- Palm Bones (Metacarpals): Within your palm outline, sketch the five metacarpal bones. Remember they are relatively long and slender. Pay attention to the slight curvature of the hand, ensuring the metacarpals aren't perfectly straight lines. The thumb's metacarpal will be shorter and thicker, articulating with the carpal bones at a distinct angle.
- Finger Bones (Phalanges): Around each of the guidelines made for the fingers, draw bone shapes for each section. For the index, middle, ring, and pinky fingers, you'll draw three distinct bone segments: proximal, middle, and distal phalanges. For the thumb, only two: proximal and distal.
- Proportionality: As you get further away from the wrist, make the bones narrower. The distal phalanx (bones in the fingertips) should be rounded at the end, mimicking the natural shape of a fingertip. Pay close attention to the length relationships between the different phalanges – the proximal is usually the longest, followed by the middle, then the distal.
- Joints: Lightly indicate the joints (knuckles) where the bones connect. These are crucial for depicting movement and flexibility later on.
This systematic breakdown ensures anatomical correctness and makes the process of drawing each bone individually much less overwhelming. Feel free to comment down below any questions as you progress!
Mastering Shading and Pen Details for Realism
Once the basic bone structure of your skeleton hand drawing is complete, the magic of realism comes alive through shading and detailing. This is where your sketch truly transforms into a three-dimensional form. Follow the instructions to add shading and pen details, bringing depth and texture to your bones.
- Light Source: First, decide on your light source. Where is the light coming from? This will dictate where the highlights and shadows fall. Bones are not flat; they have curves and contours that catch light and cast shadows.
- Building Up Tone: Start with light layers of graphite, gradually building up darker tones in the areas that are in shadow. Use your blending tools to create smooth transitions between light and dark. Pay attention to the rounded forms of the bones; shadows will typically be on the sides opposite the light source, and highlights on the surfaces facing it.
- Adding Texture: Bones aren't perfectly smooth. Introduce subtle textures using light, uneven strokes or stippling in certain areas, especially where cartilage might have been or where the bone surface isn't perfectly polished.
- Outlining with Dark Medium: Once you're satisfied with your shading, your skeleton hand sketch is ready for outlining with a dark medium. A fine-liner pen or a sharp 2B/4B pencil can be used to define the edges of the bones more clearly. This step helps the bones pop out from the paper.
- Pen Details: With a fine-liner, you can add minute details like hairline cracks, subtle imperfections, or cross-hatching for deeper shadows. This level of detail elevates your drawing from a simple sketch to a realistic depiction. For those interested in digital art, a video tutorial or illustrations with tips and tools for a realistic sketch can often provide excellent guidance on digital shading techniques.
Remember, patience is key. Shading is a process of layering and refining. Don't be afraid to experiment and observe how light interacts with three-dimensional objects in the real world.
Creative Applications: Beyond the Basic Sketch
Once you've mastered the fundamentals of skeleton hand drawing, the possibilities for creative expression are vast. A skeleton hand is a unique anatomical structure that can be incorporated into various artistic projects, moving beyond just anatomical studies.
Spooky Art & Halloween Crafts
The inherent macabre aesthetic of a skeleton hand makes it a perfect motif for Halloween-themed art and crafts. Learn how to draw a realistic and spooky skeleton hand in three easy steps, and follow the guide, outline, and color tips to create your own Halloween clipart or craft. Imagine a skeleton hand reaching out from beneath cracked earth or a grave, as if emerging from the ground, creating a chilling scene. Or perhaps a more whimsical approach, with a skeleton hand holding a pumpkin or a broomstick. These drawings can be used for party invitations, decorations, or even costume designs. The downloadable PDF mentioned in some tutorials often includes a coloring book page with just the outlines and an extension exercise for prompting kids to get creative, making it a fun family activity.
Body Art & Beyond
Drawing simple skeleton hands on skin is a creative and fun way to explore body art, albeit temporarily. From the wrist to the fingertips, instructions can ensure a sleek and anatomically correct design for temporary tattoos or face paint. This allows for a unique and personal expression, perfect for themed events or just for fun. Beyond temporary body art, skeleton hands can be integrated into larger illustrations, paintings, or digital art pieces. Suggestions for scenes and settings for skeleton hand drawings are endless: a skeleton hand playing a piano, with dramatic lighting casting long shadows, evokes a sense of haunting beauty and skill. Or perhaps a skeleton hand manipulating a puppet, adding a layer of eerie control. The versatility of the skeleton hand makes it a compelling element in storytelling through art.
You can find and save ideas about skeleton hand drawing, as well as skeleton hand drawing tutorials, on platforms like Pinterest, which are rich sources of inspiration and diverse artistic interpretations.
Common Pitfalls and Pro Tips for Aspiring Artists
As with any artistic endeavor, drawing a skeleton hand comes with its own set of challenges. Being aware of common pitfalls can help you avoid frustration and improve your results. Here are some tips to guide you:
- Proportionality Issues: One of the most frequent mistakes is getting the proportions wrong. Fingers might be too long or too short, or the palm might be out of scale with the fingers. Always start with basic shapes and guidelines, and constantly compare the lengths and widths of different bone segments to each other and to the overall hand.
- Ignoring Anatomy: Simply drawing "bone-like" shapes without understanding the actual structure will result in an unrealistic drawing. Take the time to study each bone group (carpals, metacarpals, phalanges) and how they connect. Remember, the human hand is a unique structure.
- Lack of Depth: Flat drawings often stem from insufficient shading or not considering the three-dimensional form of the bones. Think of each bone as a cylinder or a rounded block, not a flat cutout. Use a consistent light source.
- Over-Complicating: Especially for beginners, trying to draw every minute detail from the start can be overwhelming. Remember, this drawing a hand skeleton guide is meant for beginners, so we will break the hand down into simple forms and draw each individually.
- Not Using References: Even experienced artists rely on references. Don't try to draw a skeleton hand purely from memory, especially when starting out. High-quality reference images are your best friends.
- Patience and Practice: Learning how to draw skeleton hands is a process. Don't get discouraged if your first few attempts aren't perfect. Consistency and practice are key. A slow-paced approach allows for more thoughtful execution.
- Observe Real Hands: As I kept drawing, I realized the importance of observing real hands and how they move. Even though you're drawing bones, understanding the living hand's flexibility and range of motion will inform your skeletal drawing, making it more dynamic and believable.
By keeping these tips in mind, you can navigate the complexities of skeleton hand drawing more effectively and enjoy the learning process.
The Journey of a Thousand Bones: Personal Reflections on Drawing Skeleton Hands
I remember deciding to draw a skeleton hand for the first time, years ago. At first, it felt like a puzzle. How do all those bones fit together? The sheer number of small, oddly shaped bones seemed daunting. It wasn't like drawing a simple object; this was an intricate system, each part dependent on the others. I started with the basics, focusing on the shape of each bone and where it connected. It was tricky but fascinating.
With each attempt, the structure became clearer, and my confidence grew. What began as a mere anatomical exercise transformed into a deep appreciation for the engineering marvel that is the human hand. I found myself spending hours meticulously sketching the distal phalanx, ensuring it was rounded at the end, or refining the angle of the prehensile thumb. The process taught me not just about drawing, but about patience, observation, and the beauty of underlying structures. It's a journey that reveals how breaking down a complex subject into manageable steps truly makes the impossible possible. For anyone looking to dive into this unique anatomical structure, know that it's a great entry point into human anatomy, and a truly rewarding artistic endeavor. This really easy drawing tutorial is just the beginning of your own artistic discovery.
Conclusion
From understanding the intricate anatomy of the carpal bones, metacarpals, and phalanges to mastering the art of shading and detailing, we've explored the comprehensive journey of skeleton hand drawing. This guide has broken down a seemingly complex subject into manageable, easy-to-follow steps, emphasizing the importance of observation, practice, and a foundational understanding of human anatomy. Whether you're aiming for realistic anatomical studies or creative, spooky art, the principles remain the same: patience, attention to detail, and a willingness to learn.
We hope this article has demystified the process and inspired you to pick up your pencil and start sketching. The beauty of skeleton hand drawing lies not just in the final product, but in the fascinating learning process it offers. What are your favorite tips for drawing intricate details? Share your thoughts and experiences in the comments below, and don't hesitate to share your own skeleton hand drawings with us! If you're looking for more artistic inspiration, explore our other drawing tutorials and continue your creative journey.
- Conchita Martinez Wife
- Sone 436
- Tiktok Coins Recharge
- Kalogeras Sisters
- Securely Connect Remote Iot Vpc Raspberry Pi Free
Skeleton Hand Drawing Tutorial at GetDrawings | Free download
Skeletal Hand Drawing at GetDrawings | Free download
Left Skeleton Hand Drawing
