Effortless Beach Waves: Your Ultimate Guide To Timeless Hair
Table of Contents
- What Are Beach Waves, Exactly?
- Why Beach Waves Remain a Timeless Trend
- Preparing Your Hair for Perfect Beach Waves
- Mastering Beach Waves with a Curling Iron
- Achieving Beach Waves Using a Flat Iron
- Effortless Beach Waves: Heatless Techniques
- Tailoring Beach Waves for Every Hair Length and Type
- Finishing Touches: Elevating Your Beach Waves
What Are Beach Waves, Exactly?
When people request beach waves, they’re usually referring to soft, loose, and tousled waves in the hair, often with straighter ends. This look is reminiscent of the natural, effortless texture achieved after a day spent by the ocean, where saltwater and sea breeze work their magic. Unlike tight, uniform curls, beach waves are about creating a more relaxed, undone aesthetic. They don't aim for perfect spirals but rather for gentle bends and a lived-in feel that suggests you just woke up looking fabulous or spent a blissful afternoon at the shore. This popular hairstyle exudes a relaxed and casual vibe, making it incredibly versatile for various occasions, from a casual brunch to a more formal evening event. The key characteristics include:- Loose Definition: The waves are not tightly wound but rather soft and flowing.
- Textured Finish: There's a subtle grit or texture that prevents the hair from looking too polished or slick.
- Straighter Ends: Often, the last inch or two of the hair is left uncurled, contributing to that effortless, "undone" look.
- Natural Movement: The hair retains its natural movement and bounce, rather than being stiff or overly styled.
Why Beach Waves Remain a Timeless Trend
You’ll have to think hard to come up with a hairstyle more beloved by women all over the world than beach waves hair. Its enduring popularity isn't just a fleeting trend; it's rooted in several compelling reasons that make it a perennial favorite. Firstly, the appeal lies in its effortless charm. In an age where authenticity and natural beauty are highly valued, beach waves perfectly align with this ethos. They offer a look that appears low-maintenance and organic, even if a little styling effort goes into achieving them. This relaxed yet polished hairstyle just keeps standing up to the test of time because it strikes a perfect balance between looking put-together and being approachable. Secondly, beach waves are incredibly versatile. They can be dressed up or down, making them suitable for almost any occasion. Whether you're heading to a casual coffee date, a day at the office, or a glamorous evening event, beach waves adapt beautifully. They complement a wide range of outfits and makeup looks, adding a touch of sophisticated nonchalance. Thirdly, this style works on virtually any hair type or hair length. From short bobs to long, flowing locks, fine strands to thick, curly manes, beach waves can be customized to flatter everyone. This universal applicability significantly contributes to its widespread adoption and continued relevance in the beauty world. It’s a democratic hairstyle, accessible and flattering to all. Finally, the perception of health and vitality associated with beach waves adds to their allure. The soft, bouncy texture often suggests healthy, well-cared-for hair, enhancing one's overall appearance. This combination of effortlessness, versatility, universality, and perceived health ensures that the beach waves hair trend isn't going anywhere soon.Preparing Your Hair for Perfect Beach Waves
Achieving those dreamy beach waves isn't just about the curling technique; it starts with proper hair preparation. The foundation you lay before styling can significantly impact the longevity, texture, and overall success of your beach waves. One of the most crucial tips from experts is that beach waves usually look best on hair that has not been washed with shampoo for at least a day. Why? Because your scalp’s natural oils moisten the hair shaft and will help protect it from the intense heat of a flat iron or curling wand. Freshly washed hair can be too soft and slippery, making it difficult for curls to hold their shape. The slight grit from day-old hair provides better grip and texture, allowing the waves to form and last longer. If your hair tends to get oily quickly, a little dry shampoo at the roots can help absorb excess oil while preserving the natural texture. Beyond the wash schedule, heat protection is non-negotiable, especially when using hot tools. Another way to protect your hair is to use a heat protectant spray. This creates a barrier between your hair and the intense heat, minimizing damage, dryness, and breakage. Before applying any heat, mist your hair evenly with a good quality heat protectant from roots to ends. Here’s a quick checklist for optimal preparation:- Day-Old Hair: Ideally, start with hair that hasn't been shampooed for 24-48 hours.
- Dry Hair: Ensure your hair is completely dry before applying heat. Styling damp hair with hot tools can cause severe damage.
- Heat Protectant: Always apply a generous amount of heat protectant spray.
- Sectioning: For easier and more uniform styling, divide your hair into manageable sections. Clipping up the top layers allows you to work on the bottom sections first.
- Brushing: Gently brush through your hair to remove any tangles, ensuring a smooth surface for styling.
Mastering Beach Waves with a Curling Iron
The curling iron is a classic tool for creating beach waves, offering control over the wave's shape and intensity. The key to achieving that relaxed, natural look with a curling iron lies in technique and barrel size. To get this beach wave hair with a curling iron, you'll want to use a large barrel one – typically 1.25 to 1.5 inches in diameter. A larger barrel creates looser, more natural-looking waves, avoiding tight, ringlet-like curls. Here's a step-by-step guide:- Section Your Hair: After applying heat protectant, divide your hair into manageable sections. Start with the bottom layers and work your way up.
- Hold the Iron Correctly: For perfect beachy waves, avoid starting at the scalp. Instead, place the iron a few inches down the hair shaft, depending on the length of your hair. This leaves the roots straighter, contributing to the undone look.
- Wrap the Hair: Take a 1-inch section of hair and wrap it around the barrel, away from your face. Don't clamp the ends with the iron's clip; instead, leave the last inch or two of the hair out of the wrap. This is crucial for achieving those signature straighter ends.
- Hold and Release: Hold the hair around the barrel for 5-10 seconds, depending on your hair type and the heat setting. Then, gently release the curl.
- Alternate Directions: For a more natural, less uniform look, alternate the direction you wrap each section of hair. Curl one section away from your face, the next towards your face, and so on.
- Focus on Top Layers: Once you reach the top layers of the hair, pay extra attention to how you curl them, as these will be most visible.
Choosing the Right Barrel Size
The barrel size of your curling iron is paramount for beach waves.- 1-inch barrel: Good for tighter waves or if you have very short hair and want more defined bends.
- 1.25-inch barrel: The most popular choice for classic beach waves, offering a balance of looseness and definition.
- 1.5-inch barrel: Ideal for very long hair or for creating super loose, voluminous waves.
Achieving Beach Waves Using a Flat Iron
While often associated with straightening, a flat iron is an incredibly versatile tool for creating beautiful beach waves. It offers a unique S-bend wave that looks incredibly natural and effortless. The same rule applies to flat irons—the thicker the hair, the easier it is to use a wider, larger iron, typically 1 to 1.5 inches wide. Here's how to achieve beachy waves with a flat iron, ensuring your hair is prepared with heat protectant:- Section Your Hair: Just like with a curling iron, section your hair into manageable parts.
- Position the Iron: Take a 1-inch section of hair. For perfect beachy waves, avoid starting at the scalp. Instead, place the iron a few inches down the hair shaft, depending on the length.
- The Bend and Glide: Clamp the flat iron onto the hair section. Now, here's the trick:
- Turn the iron downwards (towards the floor) and pull it down about an inch.
- Then, turn the iron upwards (towards the ceiling) and pull it down another inch.
- Continue this "S" motion, alternating the direction of the iron as you glide it down the hair shaft.
- Leave Ends Straight: As you reach the ends of the hair, release the iron, leaving the last inch or two straight. This contributes to the authentic beachy look.
- Repeat: Continue this technique throughout your hair, working section by section.
- Vary Direction: For a more natural finish, vary the direction of your "S" bends slightly from section to section.
The 'S-Bend' Technique
The 'S-bend' is the core of flat iron beach waves. Unlike wrapping hair around a barrel, the flat iron creates a flatter, more relaxed wave pattern. It's about bending into the hair with a flat iron rather than curling it. This technique is particularly effective for achieving soft waves with straighter ends. It might take some practice to get the fluid motion right, but once you master it, you'll find it incredibly quick and efficient. View full post on YouTube or other video tutorials for visual guidance if you're a beginner; seeing the motion in action can be incredibly helpful.Effortless Beach Waves: Heatless Techniques
For those who prefer to avoid heat styling or want to achieve beach waves overnight, heatless methods are a fantastic alternative. Learn how to create soft, effortless waves with or without heat, clips, or braids. These techniques often result in a more natural, softer wave pattern and are excellent for maintaining hair health. Here are a few popular heatless methods:- Braids: This is perhaps the simplest and most common heatless method.
- Start with slightly damp hair (either air-dried or misted with water/sea salt spray).
- Braid your hair into one or two loose braids (for looser waves) or multiple smaller braids (for more defined waves).
- Sleep on them overnight or let them air dry completely.
- Gently unravel the braids in the morning and finger-comb to separate the waves.
- Buns/Knots:
- With damp hair, twist sections into small, loose buns or knots.
- Secure them with soft hair ties or clips.
- Allow to dry completely, then release.
- Hair Rollers/Flexi-Rods: While requiring tools, these are heatless.
- Roll sections of damp hair onto soft rollers or flexi-rods.
- Allow to air dry or use a diffuser on a cool setting.
- Unroll to reveal soft waves.
- Twisting and Pinning:
- Take small sections of damp hair and twist them tightly.
- Coil the twisted section into a small bun against your scalp and secure with a bobby pin.
- Repeat all over your head.
- Once dry, release the pins and gently shake out the waves.
Tailoring Beach Waves for Every Hair Length and Type
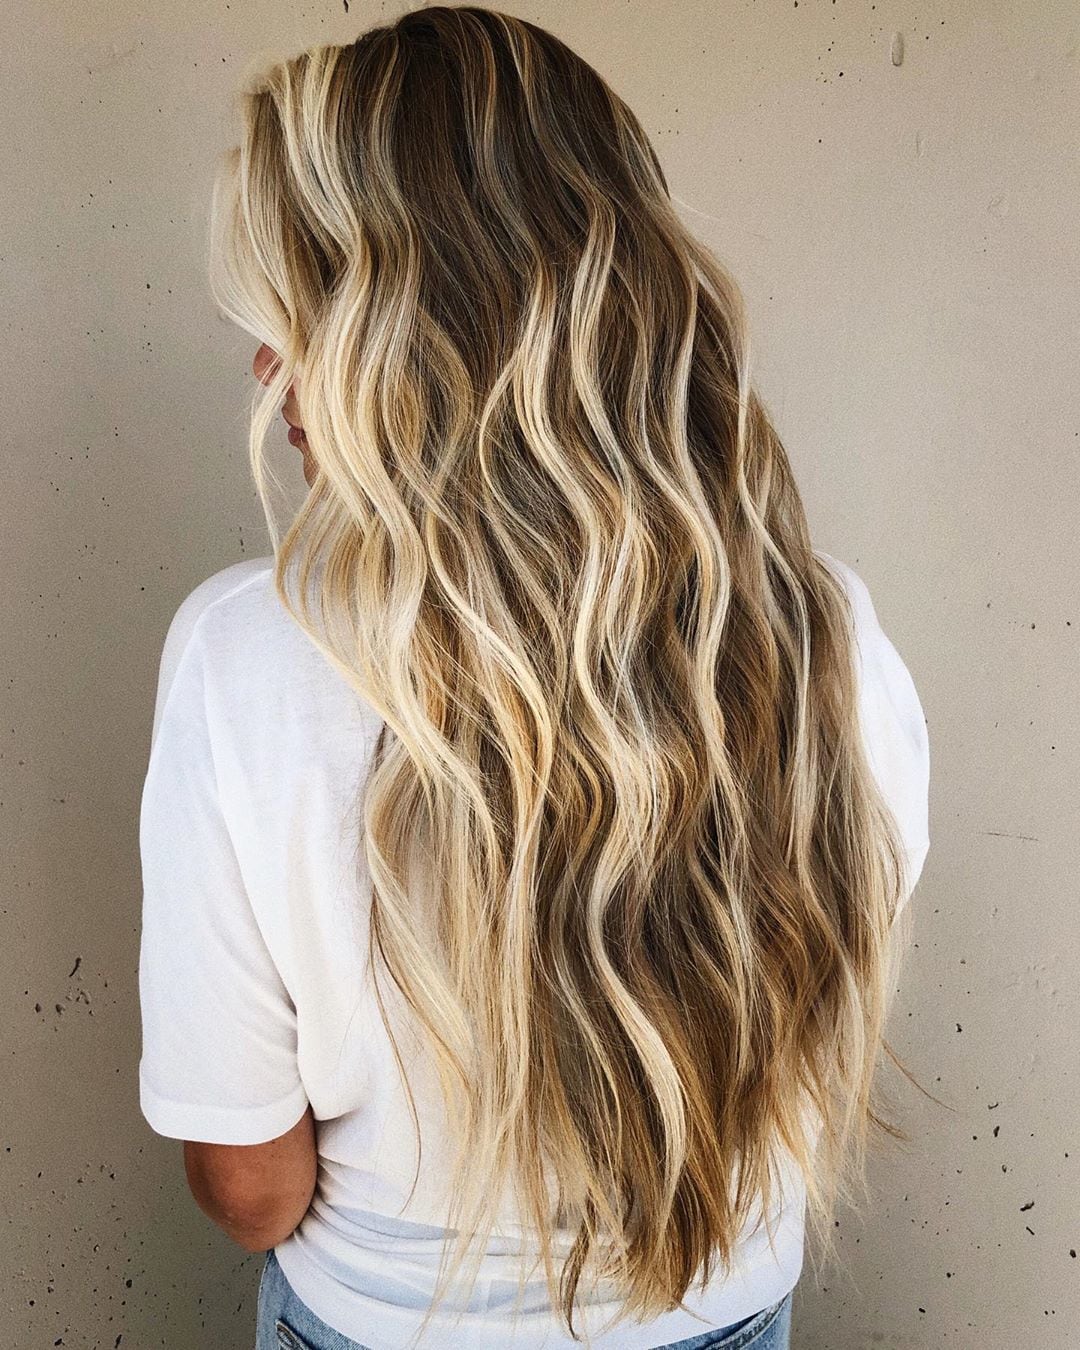
One of the greatest strengths of beach waves is their adaptability. Learn how to create beach waves for long, medium, short, thick, and curly hair with various styling tools and products. Beachy waves are easy to create and can work on virtually any hair type or hair length, but a few tweaks can optimize the results for your specific hair. * Long Hair: For long hair, focus on creating waves from the mid-shaft down, leaving the roots relatively straight. A large barrel curling iron (1.5-2 inches) or a flat iron using the S-bend technique works wonders. You might need to use larger sections to avoid too many tight curls. * Medium Length Hair: This length is arguably the easiest for beach waves. Both curling irons (1.25-1.5 inches) and flat irons are excellent. You can start the waves slightly higher up the head for more volume. * Short Hair: How to do beach waves on short hair? It’s absolutely achievable! The perfect waves for short hair are bouncy and fun. Use a smaller barrel curling iron (1 inch or 0.75 inch) or a flat iron. Focus on creating bends rather than full curls, and remember to leave the ends out. Texturizing spray is your best friend for short beach waves. * Thick Hair: Thick hair holds curls well but can be heavy. Use larger sections and a higher heat setting (with heat protectant!) to ensure the waves set. A larger barrel curling iron or a wider flat iron will be more efficient. Don't over-curl; aim for loose bends. * Fine Hair: Fine hair can struggle to hold a curl. Use a texturizing spray before styling and a light-hold hairspray afterward. Smaller sections and a slightly longer hold time with the iron can help. Heatless braids or buns overnight can also be very effective for fine hair. * Curly Hair: If you have naturally curly hair, beach waves are about refining and loosening your existing curl pattern. Instead of creating new waves, you can use a flat iron to gently straighten parts of your curls and then bend them into looser waves. A wide-tooth comb or just your fingers can help break up tight curls into softer beach waves. A leave-in conditioner or anti-frizz serum can help manage natural curl texture while creating waves. Find tips and tutorials for different hair lengths and styles from various bloggers and experts. There are 29 beach wave hairstyles with photos and examples for inspiration available online, showcasing the incredible versatility of this look across all hair types and lengths. Today I'm showing you how to get these super easy and effortless beach waves. This works on all hair lengths whether your hair is short, medium length or long.Bouncy Waves for Short Hair
Creating beach waves on short hair might seem challenging, but it’s entirely possible and results in a chic, playful look. The key is to focus on creating bends and texture rather than full curls. Get this beach wave hair with a curling iron (the large barrel one is still good for loose bends, or a smaller one for more definition), using it on the top layers of the hair. Here’s a simplified approach for short hair:- Small Sections: Work with smaller sections of hair, especially around the face.
- Quick Bends: Instead of wrapping the hair fully around the iron, quickly clamp and release, creating a soft bend. Or, use the flat iron S-bend technique on short sections.
- Leave Ends Out: Always leave the ends straight to avoid a "curled under" look, which can make short hair appear dated.
- Alternate Directions: Vary the direction of the waves to add natural movement and prevent a uniform, helmet-like appearance.
- Focus on Top Layers: For short hair, the top layers are crucial for volume and shape. Use the curling iron on these sections, focusing on creating lift at the roots.
Finishing Touches: Elevating Your Beach Waves
Once you've created your waves, the final steps are crucial for achieving that perfectly imperfect beachy look and ensuring longevity. These finishing touches transform raw curls into refined, effortless beach waves.Adding Volume and Texture
The hallmark of great beach waves is their natural texture and volume. Next, you’ll want to break up the curls and tease the top and back of the hair to create volume.- Break Up the Curls: Once all sections are curled and cooled, resist the urge to brush them immediately. Instead, gently run your fingers through your hair to break up the curls. You can also lightly shake your head to encourage them to loosen. This step is vital for transitioning from defined curls to relaxed waves. A wide-tooth comb can also be used very gently if your waves are too uniform.
- Tease for Volume: For added lift and that quintessential voluminous beach wave look, gently tease the top and back of your hair. Use a fine-tooth comb to backcomb small sections at the roots, then smooth over the top layer. This creates a soft cushion of volume without looking stiff.
- Texturizing Spray: A sea salt spray or texturizing spray is your secret weapon. Mist it lightly through your waves, scrunching gently with your hands. This enhances the "beach" effect, adding grit and hold while boosting texture.
- Hair Spray: Finish with a light-hold hairspray to set your waves without making them stiff or crunchy. You want movement, not a helmet-like finish. Hold the can about 10-12 inches away from your head and mist evenly.
- Optional: Dry Shampoo: If you want to absorb any excess oil or add more texture, a quick spray of dry shampoo at the roots can be beneficial.
Conclusion
The beach waves hair style truly is a timeless classic, beloved for its effortless charm, incredible versatility, and universal appeal across all hair lengths and types. We've explored what defines these soft, tousled waves, why they remain a perennial favorite, and the crucial steps to prepare your hair for styling. Whether you prefer the precision of a curling iron, the unique bends of a flat iron, or the gentle touch of heatless methods, there's a technique for everyone to achieve these coveted waves. We've also highlighted how to tailor your approach for short, long, thick, or fine hair, ensuring that bouncy, beautiful beach waves are within everyone's reach. Remember, practice makes perfect, and experimenting with different tools and products will help you discover what works best for your unique hair. Always prioritize hair health by using heat protectant and embracing day-old hair's natural oils. Now that you're equipped with the ultimate guide to beach waves, it's time to try these techniques yourself! Share your favorite beach wave tips in the comments below, or let us know which method you're excited to try first. Don't forget to share this article with your friends who are also chasing that perfect, sun-kissed hair look! For more hair styling tips and tricks, explore other articles on our site.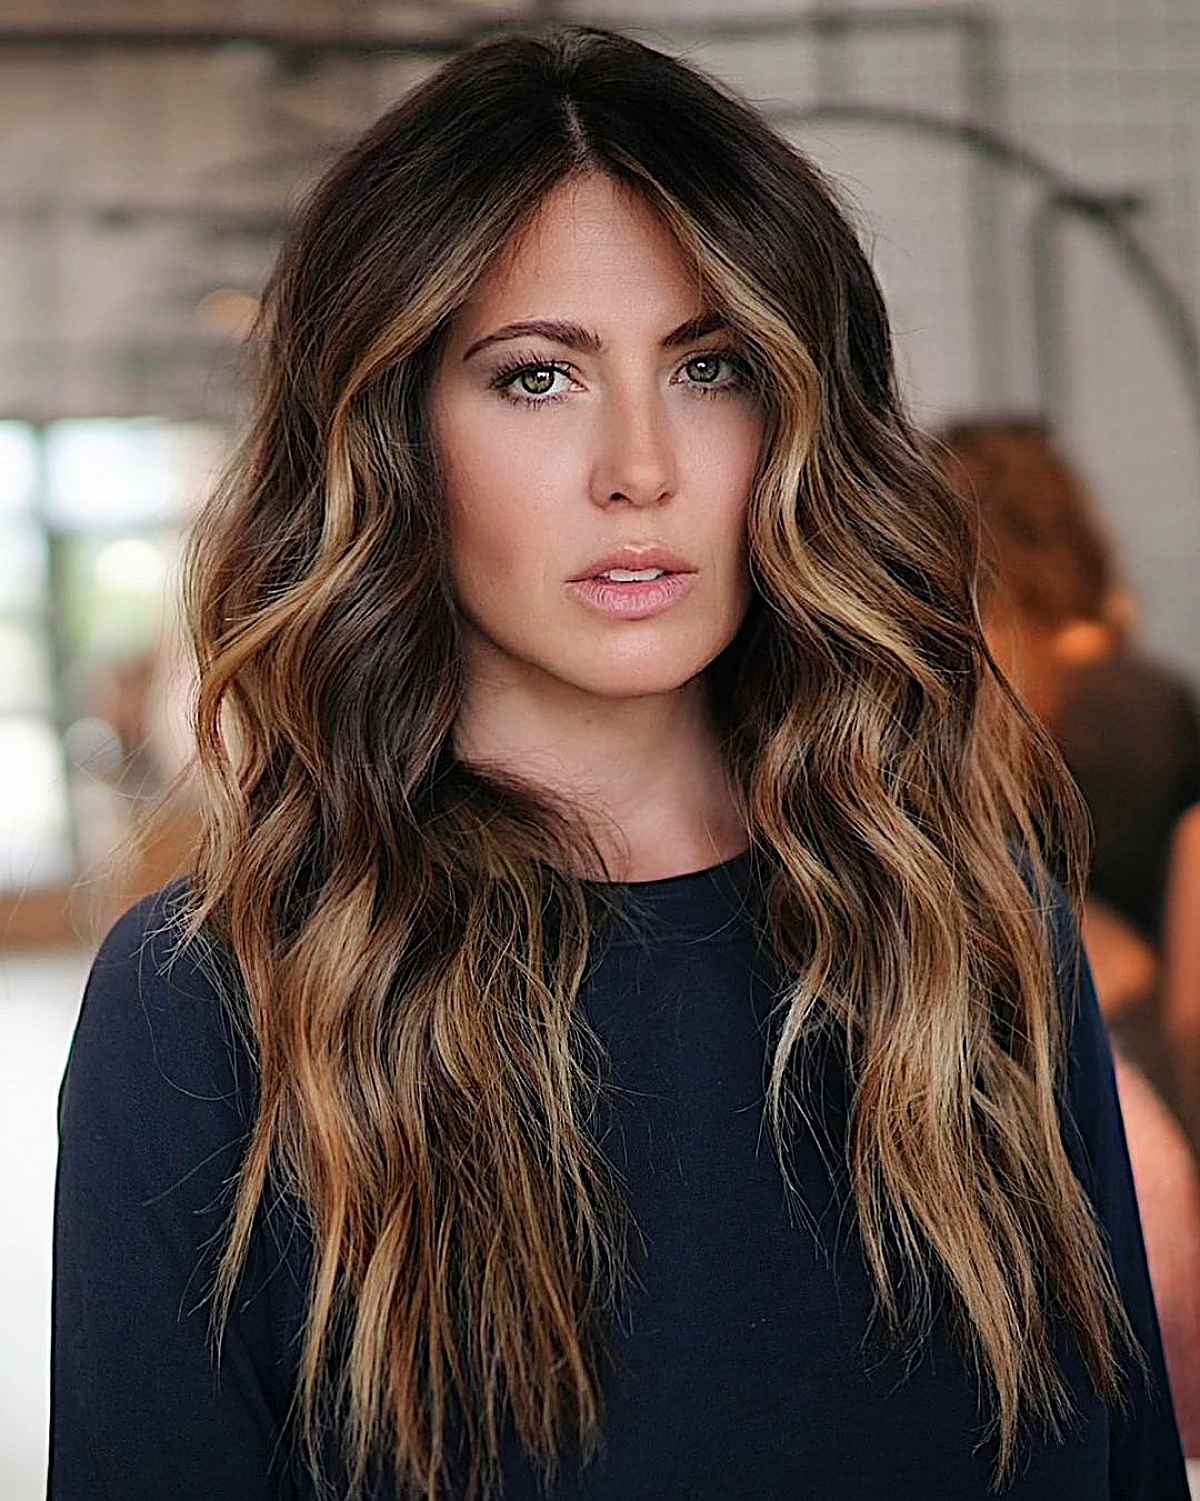
Beach Waves Hairstyle
21 Beach Wave Hair Ideas For 2019 | How To Get Perfect Beach Waves

Beach wave hair style | Beach wave hair, Hair styles, Hair waves
