Unlock Your Inner Artist: Mastering Mountains Drawing Today!
Table of Contents
- Why Draw Mountains? The Enduring Appeal of Majestic Peaks
- Getting Started: Essential Tools for Your Mountains Drawing Journey
- The Foundation: Simple Steps to Outline Your Mountain Landscape
- Bringing Mountains to Life: Mastering Light, Shadow, and Texture
- Beyond the Basics: Advanced Techniques for Realistic Mountains Drawing
- Choosing Your Palette: Colors for Captivating Mountain Scenes
- Tips and Tricks for Effortless Mountains Drawing
- Showcasing Your Art: What to Do With Your Mountains Drawing
Why Draw Mountains? The Enduring Appeal of Majestic Peaks
Mountains have captivated humanity for millennia. They represent strength, solitude, and the raw power of nature. For artists, they offer an incredible playground of shapes, textures, and light. If you're looking for beautiful, spacious skies and purple mountain majesties, you've come to the right place, not just to admire them, but to learn how to translate that beauty onto paper. Drawing mountains allows you to connect with nature on a deeper level, observing the subtle shifts in light and shadow, the unique geological formations, and the way they interact with the sky. It's a meditative process that hones your observational skills and artistic hand. Moreover, mastering mountains drawing opens up a world of landscape possibilities, as mountains often serve as the dramatic backdrop or focal point in many scenic compositions.Getting Started: Essential Tools for Your Mountains Drawing Journey
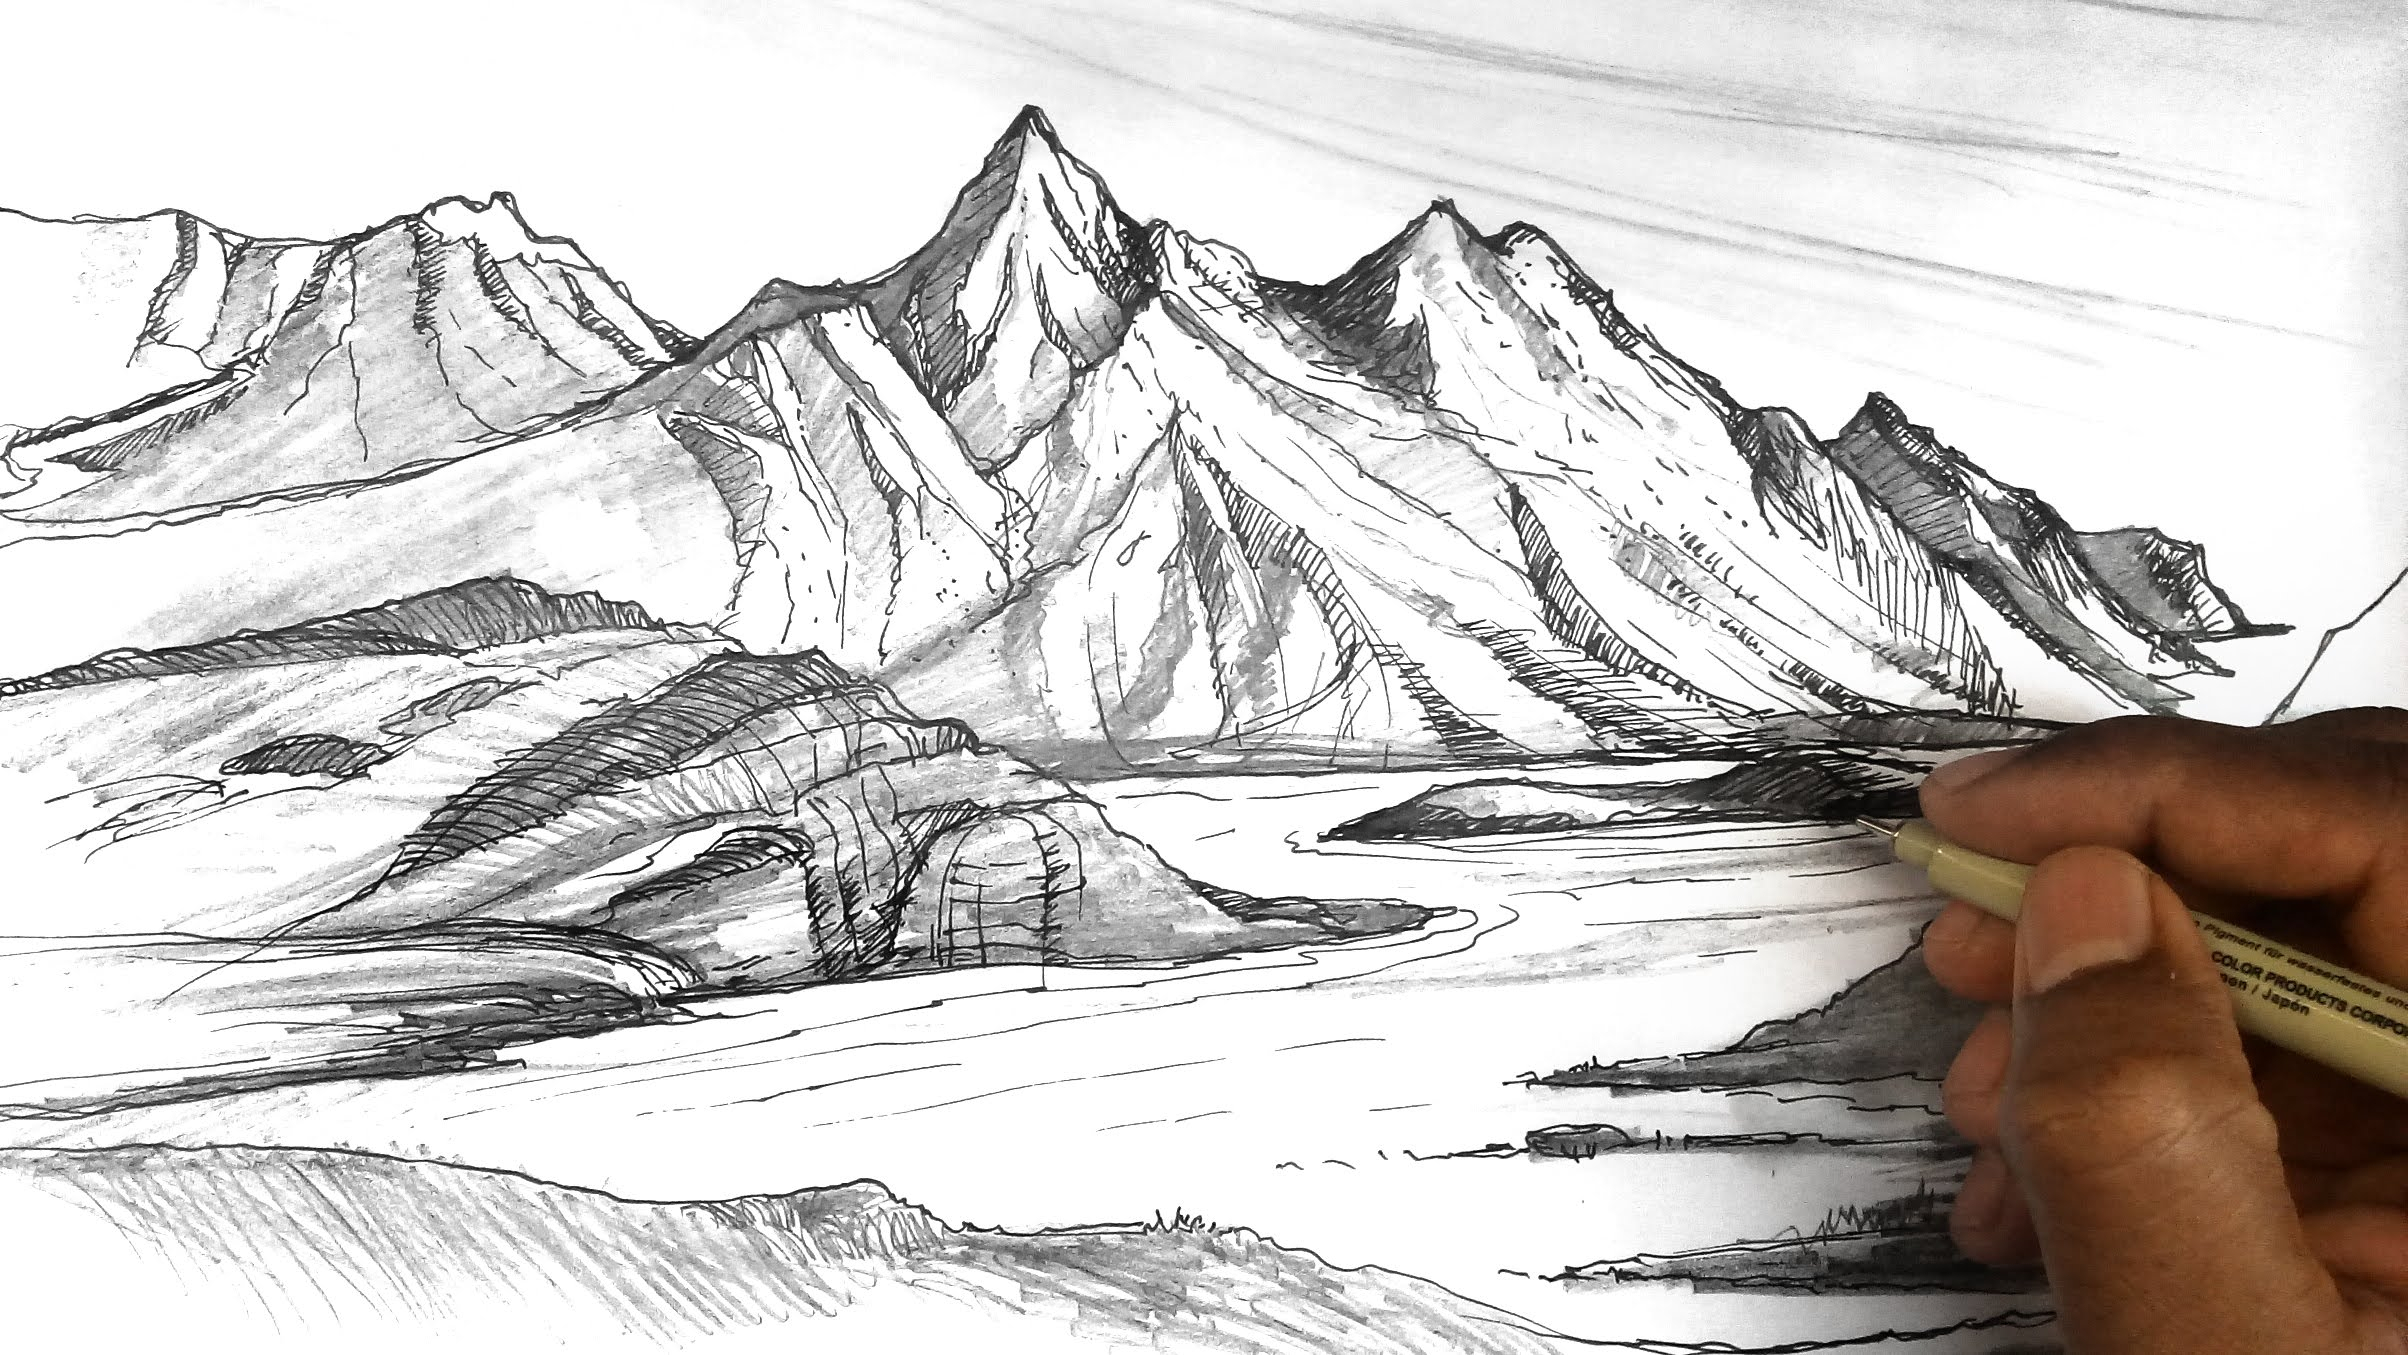
You don't need an elaborate art studio to begin your mountains drawing adventure. The beauty of sketching is its simplicity. Here's what you'll need: * **Pencils:** A range of graphite pencils (HB, 2B, 4B, 6B) will give you versatility for sketching outlines and achieving different levels of shading. An HB is great for initial light sketches, while softer leads (like 4B or 6B) are perfect for darker shadows and rich textures. * **Paper:** Any standard drawing paper will do to start. Experiment with different textures as you advance. * **Eraser:** A kneaded eraser is excellent for lifting graphite without smudging, and a vinyl eraser for precise clean-ups. * **Crayons and Markers (Optional):** If you're looking to add color, especially for children and beginners, crayons and markers are fantastic. Learn how to draw mountains with different sizes, shapes, and shadows using crayons and a marker. They offer vibrant hues and are easy to control. * **Reference Photos:** While drawing from imagination is great, using reference photos, especially when learning, can be incredibly helpful. Learn how to sketch the outline and shading of a mountain landscape with a reference photo. This allows you to observe real-world light, shadow, and geological features. Remember, the goal is to learn and enjoy the process, so don't get hung up on having the "perfect" tools. Start simple, and expand as your skills and interests grow.The Foundation: Simple Steps to Outline Your Mountain Landscape
Every impressive mountains drawing begins with a solid foundation. Think of it as building the skeleton of your masterpiece. We'll start with basic shapes and lines to establish the overall composition.The Horizon Line: Setting the Stage
The very first step in any landscape drawing is to establish your horizon line. The drawing begins with a simple horizontal line across the page. This line serves as the base from which the mountain will rise. Draw a horizontally straight line, dividing the sheet in half, you designate a place in the distance from which the highlands will begin. This line doesn't have to be perfectly in the middle; shifting it higher or lower can change the emphasis of your drawing, giving more space to the sky or the foreground. The line should be smooth and even, acting as a subtle guide rather than a dominant feature. This foundational line helps to establish perspective and gives your mountains a grounded place in the composition.Basic Shapes: Triangles and Jagged Lines
Now, let's bring those peaks to life. This tutorial is regarding drawing mountains in simple and easy steps for children and beginners. So, children, we will learn simple mountain drawings. 1. **The Main Peak:** Start by drawing a large triangle in the center of your paper. This will be the first and tallest mountain in your drawing. The key here is not to make it a perfect geometric triangle. Try to make the sides slightly uneven to create a more natural look rather than a perfect geometric shape. Mountains in nature are rarely perfectly symmetrical. 2. **Adding Companion Peaks:** Next, draw additional triangles on both sides of the first mountain. These can be smaller, taller, or wider, creating a varied and interesting mountain range. You can make your mountains with one peak, or several. 3. **Refining Outlines:** On the horizon, drawing the first wavy line, you begin to give your mountains their unique character. Depict the outline of the mountain. Instead of sharp, straight lines, use jagged, irregular lines to mimic the rocky, uneven surfaces of real mountains. Learn how to draw realistic mountains with a simple triangle shape and jagged lines. In the distance, add two more rocks to suggest depth. 4. **Building the Range:** Draw two mountain peaks on the left and two mountain peaks on the right. This creates a sense of continuity and a full mountain range. Remember, there are so many different ways to draw mountains; you can experiment with different sizes and shapes to create your own unique landscape. This initial outline is about getting the basic form down. Don't worry about perfection at this stage. It's a rough sketch, a blueprint for what's to come.Bringing Mountains to Life: Mastering Light, Shadow, and Texture
Once you have the basic shapes, the real magic begins: adding depth and realism. This is where light, shadow, and texture come into play. Completing a mountain drawing involves careful attention to layering, proportion, and final adjustments.Understanding Light Sources and Shading
Light and shadow are crucial for creating a three-dimensional effect. Without them, your mountains will look flat. Learn how to draw mountains with light and shadow effects in 10 simple steps. 1. **Identify Your Light Source:** Before you start shading, decide where your light source is coming from (e.g., top-left, top-right). This will dictate which parts of the mountain are illuminated and which are in shadow. 2. **Apply Basic Shading:** The side of the mountain facing the light source will be lighter, while the opposite side will be darker. Use lighter pencil strokes for illuminated areas and gradually increase pressure or use a softer lead for shadowed areas. 3. **Subtle Gradations:** Mountains aren't uniformly lit or shadowed. There will be subtle gradations. Observe how the light falls on different planes and crevices. Create a realistic mountain range with light and shadow effects by varying your pressure and layering your pencil strokes. 4. **Cast Shadows:** Don't forget the shadows that one mountain casts onto another, or onto the ground. These cast shadows further enhance the sense of depth and realism. And there’s so many different ways you can make the shadows on your mountain drawings.Adding Depth with Line Work and Texture
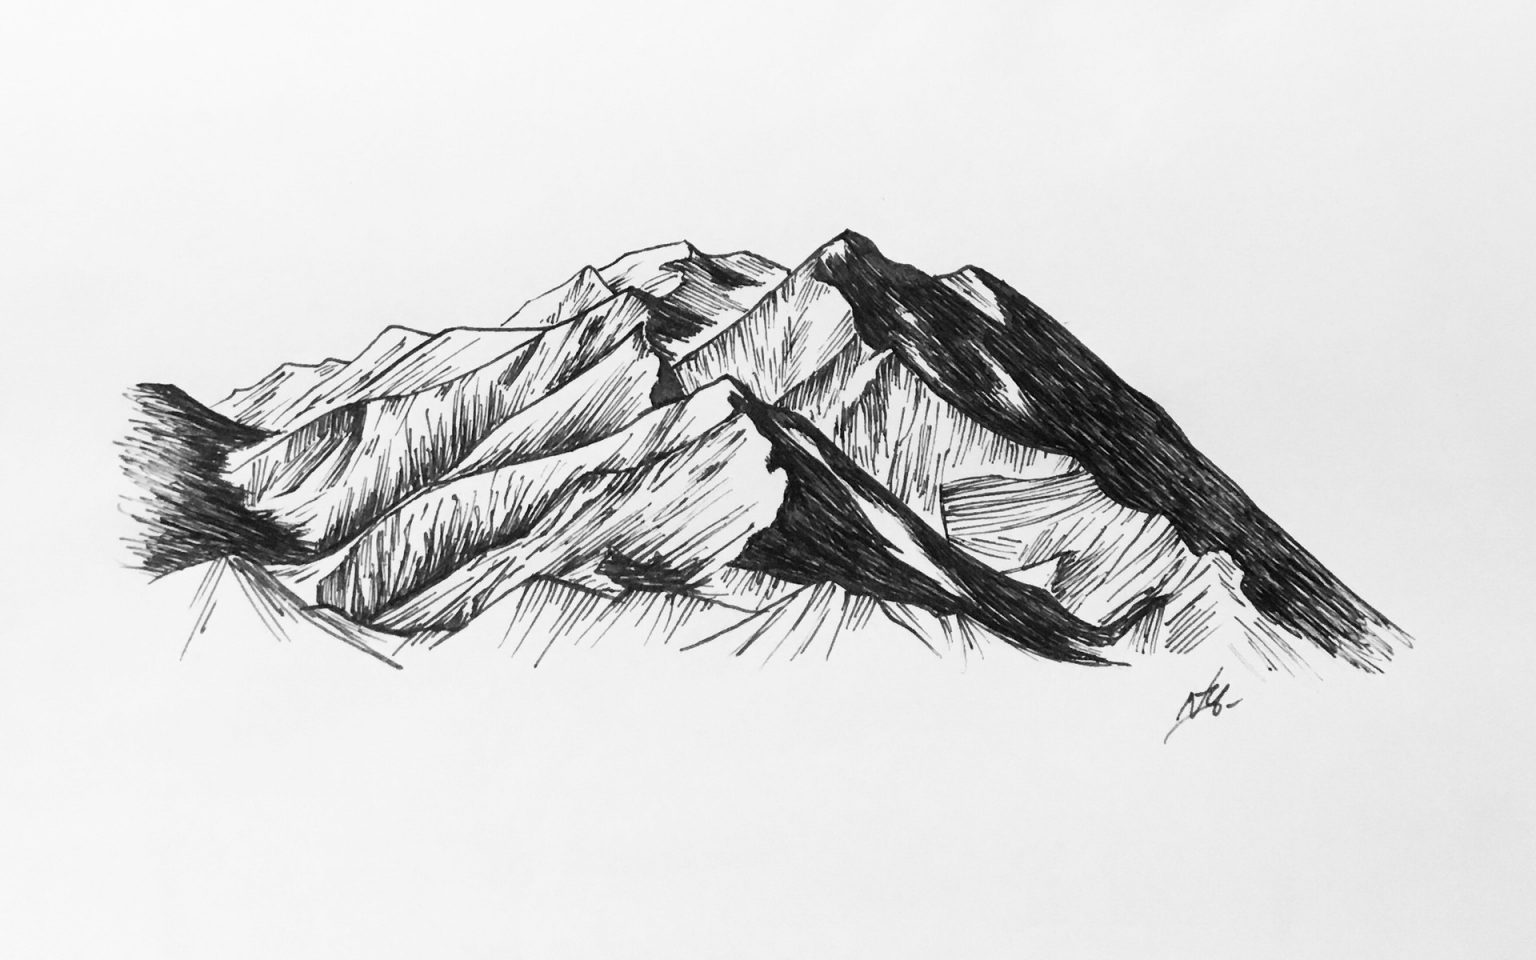
Layering is essential in creating depth in mountain drawings. Artists should begin by establishing a base layer with softer pencil strokes. 1. **Line Work for Form:** Use varying line weights to define the contours and planes of the mountain. Sharper, darker lines can indicate edges closer to the viewer, while lighter, softer lines can suggest features further away. 2. **Texture through Hatching and Cross-hatching:** To create the rugged texture of rocks and cliffs, use techniques like hatching (parallel lines) and cross-hatching (intersecting parallel lines). The closer the lines, the denser and darker the texture appears. This adds incredible detail and realism. 3. **Stippling and Scumbling:** For more subtle textures, especially for distant mountains or snow, consider stippling (dots) or scumbling (small, circular scribbles). These techniques can create a soft, ethereal feel. 4. **Refining Details:** This mountains drawing we created looks amazing with all of its details. However, these details can trip you up sometimes, so it could be useful to remove a few of them if they become overwhelming. Focus on key details that enhance the overall impression rather than trying to draw every single rock. By meticulously applying light and shadow effects, line work, and texture, you'll transform simple outlines into a vibrant, three-dimensional landscape. Follow the instructions and examples to create your own realistic mountain drawings.Beyond the Basics: Advanced Techniques for Realistic Mountains Drawing
Once you're comfortable with the fundamentals, you can explore more advanced techniques to make your mountains drawing truly exceptional. These methods will help you achieve even greater realism and artistic flair. 1. **Aerial Perspective:** This is crucial for creating the illusion of distance. Objects further away appear lighter, less saturated in color, and have less detail due to atmospheric haze. To depict this, use lighter pencil pressure and less defined lines for distant peaks. This helps to create depth and push some mountains further into the background. 2. **Foreshortening and Overlapping:** When drawing a mountain range, elements that are closer to the viewer will appear larger and will overlap elements that are further away. This simple principle of overlapping is incredibly effective in creating a sense of depth and dimension. 3. **Adding Elements to Your Landscape:** A mountain doesn't exist in isolation. Follow the instructions and tips to create depth, light and shadow effects, and add more elements to your landscape. * **Trees:** Draw a tree at the foot of the mountain. Trees add scale and foreground interest. Vary their size and type to add variety. * **Rocks:** Draw rocks in the right corner or scattered around the base of the mountains. These add texture and grounding elements. * **Water Bodies:** Draw a river below the picture. Rivers, lakes, or streams reflect the sky and mountains, adding dynamic elements and opportunities for interesting light effects. * **Clouds and Sky:** The sky is an integral part of any mountain landscape. Learn to draw different cloud formations that interact with the peaks, enhancing the mood of your drawing. 4. **Understanding Geological Formations:** Different types of mountains (volcanic, folded, block) have distinct shapes and features. Researching these can help you draw more authentic and varied mountain ranges. 5. **Shading Methods for Impact:** You’ll learn mountain range drawing easy, shading methods, and simple tricks to make your drawings pop. Experiment with blending stumps or tortillons to smooth out graphite for softer transitions, or use an eraser to lift highlights and create sharp edges for snow caps or sun-kissed peaks. By incorporating these techniques, you'll move beyond simple shapes to create dynamic and believable mountain scenes. You can add snow caps, or leave them off, depending on the desired effect.Choosing Your Palette: Colors for Captivating Mountain Scenes
While graphite drawings are powerful, adding color can elevate your mountains drawing to another level. Choosing the right colors for your mountain drawing depends on the type of mountain you want to draw and the time of day or weather conditions you wish to depict. * **Snowy Mountains:** For example, a snowy mountain may require shades of white, blue, and gray. Use cool blues and grays for shadowed snow, and warmer whites or even faint yellows for sunlit areas. The interplay of these cool and warm tones creates incredible realism. * **Green Mountains/Forested Peaks:** If your mountains are covered in greenery, you'll need shades of green and brown. Vary the greens from deep forest greens to lighter, almost yellow-greens for areas catching more light. Browns can be used for exposed rock faces or tree trunks. * **Rocky/Barren Mountains:** For rugged, rocky mountains, focus on earthy tones: various shades of brown, gray, and even hints of red or orange, depending on the mineral composition of the rock. * **Time of Day/Atmosphere:** * **Sunrise/Sunset:** These times offer dramatic color palettes. Think warm oranges, pinks, purples, and deep blues for the sky, reflecting onto the mountain peaks. * **Midday:** Colors tend to be brighter and more direct, with strong contrasts between light and shadow. * **Overcast/Stormy:** Muted tones of gray, blue, and purple dominate, creating a moody and atmospheric scene. * **Layering Colors:** Just like with graphite, layering colors is key. Start with lighter washes or soft crayon strokes, then build up darker tones and details. This allows for smooth transitions and rich, vibrant hues. Experimentation is key. Don't be afraid to mix colors and try different combinations to achieve the desired effect for your unique mountains drawing.Tips and Tricks for Effortless Mountains Drawing
Learning to draw is a journey, and there are always ways to make the process smoother and more enjoyable. Here are 3 more tips to make your mountains drawing easy: 1. **Simplify, Don't Overcomplicate:** While details are important, sometimes they can overwhelm a beginner. This mountains drawing we created looks amazing with all of its details. These details can trip you up sometimes, however, so it could be useful to remove a few of them. Focus on the big shapes and light/shadow first. You can always add more intricate details later as your confidence grows. Make these easy to draw mountains even easier with the help of these fun tips. 2. **Practice on Artist Trading Cards (ATCs):** To save time, try making them on artist trading cards. These small, 2.5 x 3.5-inch pieces of cardstock are perfect for quick sketches and experimenting with different mountain forms or shading techniques without committing to a large drawing. This is a great time saver and encourages frequent practice. 3. **Use a Reference Photo, But Don't Copy Blindly:** As mentioned, reference photos are invaluable. However, don't feel pressured to replicate every single detail exactly. Use the photo as a guide for light, shadow, and general form, but allow yourself the freedom to interpret and simplify. This helps develop your artistic eye rather than just your copying skills. 4. **Embrace Imperfection:** No two mountains are identical, and neither should your drawings be. Don't strive for photographic perfection, especially when starting. Embrace the unique character of your lines and shapes. The beauty often lies in the imperfections. 5. **Break It Down:** Does drawing an entire landscape intimidate you? Break it down into smaller, manageable parts. Focus on one peak at a time, then connect them. This makes the overall task less daunting. Remember the "draw axis" method: draw a horizontally straight line, then add two mountain peaks on the left, two on the right, and build from there. By following these instructions and tips, you'll be well on your way to creating stunning mountain landscapes. You’ll learn mountain range drawing easy, shading methods, and simple tricks to make your drawings pop.Showcasing Your Art: What to Do With Your Mountains Drawing
You've put in the effort, learned the techniques, and created beautiful mountains drawings. Now what? Don't let your masterpieces languish in a forgotten drawer! * **Add to Your Sketchbook:** This is a natural home for your practice pieces and finished works. A sketchbook serves as a visual diary of your artistic progress. Add this mountains drawing to your sketchbook, noting down the date or any new techniques you tried. * **Hang It on Your Wall:** If you're particularly proud of a piece, frame it! It is pretty enough to frame. Seeing your art displayed can be incredibly motivating and a testament to your growing skills. * **Share Online:** The art community thrives on sharing. Platforms like Pinterest, Instagram, or dedicated art forums are excellent places to showcase your work. Find and save ideas about mountain drawing on Pinterest and contribute your own! Use hashtags like #easydrawing #freedrawingandpaintinlessons #knowingdrawingacademy #josemanuelgallegogarciado to connect with other artists and find inspiration. * **Gift Your Art:** A handmade drawing makes a thoughtful and personal gift for friends and family. * **Continue Learning:** The world of art is vast. Learn more about the mountains drawing and explore other landscape elements, different mediums, or advanced composition techniques.Conclusion
From sketching the initial triangle shape to mastering light and shadow effects, you've now gained a comprehensive understanding of how to draw mountains. We've covered everything from basic outlines and simple steps to more advanced techniques for creating realistic mountain ranges with depth, line work, and texture. Remember, the journey of an artist is one of continuous learning and practice. The most important takeaway is to enjoy the process. Every line you draw, every shadow you shade, brings you closer to capturing the majestic beauty of these natural wonders. So, grab your pencils, find a quiet spot, and let the peaks guide your hand. Don't be afraid to experiment, make mistakes, and learn from them. Your next breathtaking mountains drawing is just a few strokes away. What kind of mountains will you draw first? Share your experiences and creations in the comments below, or tag us on social media! Keep practicing, keep exploring, and let your artistic spirit soar as high as the mountains you draw.- Aag Maal
- Nude Stars Game
- Daria Rose Wilson
- Securely Connect Remote Iot Vpc Raspberry Pi Download Free
- Jellybeanbrains
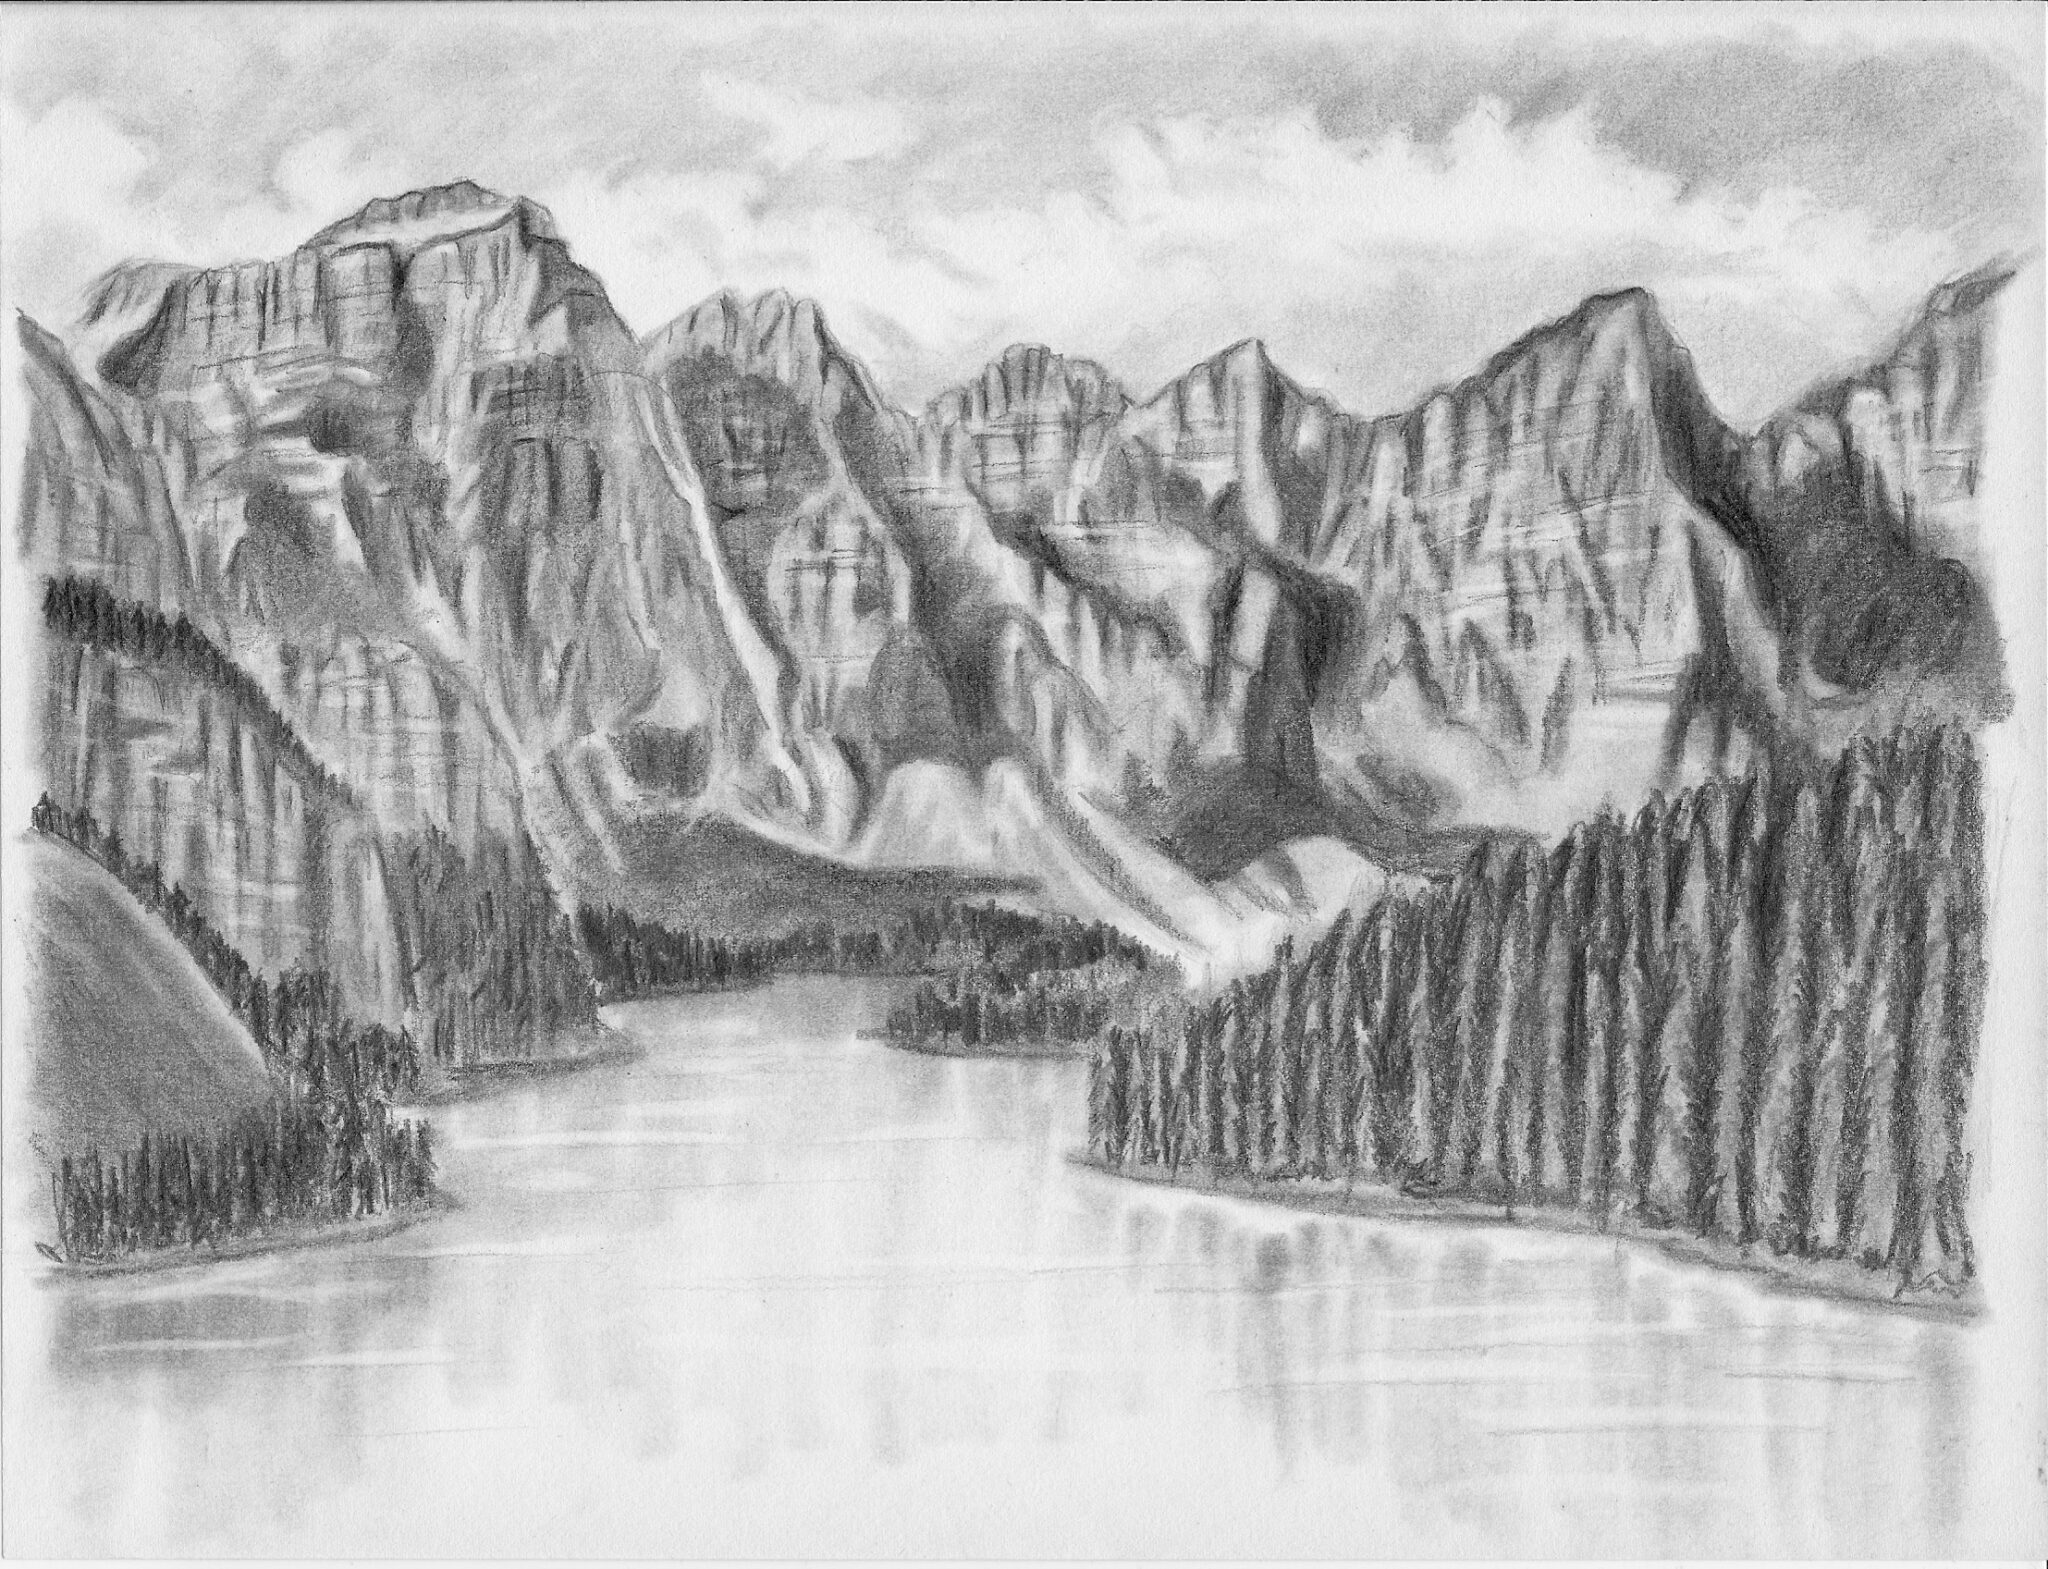
How to Draw Mountains Near a Beautiful Lake - Let's Draw Today
Great How To Draw A Mountain in the world The ultimate guide | howdrawart3
Mountain Landscape Drawing at GetDrawings | Free download
