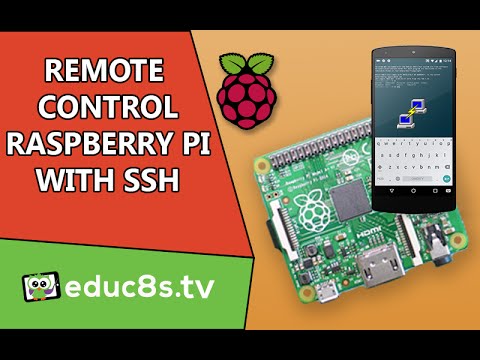
Control Your Raspberry Pi Over SSH: A Comprehensive Guide
Introduction
The Raspberry Pi is a compact and versatile microcomputer that fits in the palm of your hand. Its portability, affordability, and flexibility make it an excellent choice for hobbyists, educators, and developers alike. However, one of the most powerful features of the Raspberry Pi is the ability to control it remotely using SSH (Secure Shell). SSH allows you to securely access the command line interface of your Raspberry Pi from any computer connected to the same network or even over the internet. In this guide, we will walk you through the process of setting up SSH on your Raspberry Pi and controlling it remotely.
Why Use SSH?
SSH is a network protocol designed for secure communication between devices. It encrypts data transmitted between your local computer and the Raspberry Pi, ensuring that sensitive information, such as passwords, remains protected. With SSH, you can:
- Control the Raspberry Pi remotely without needing a monitor or keyboard.
- Run commands on the Raspberry Pi from another computer.
- Transfer files between your local computer and the Raspberry Pi securely.
For many users, SSH is the preferred method for remote access because it is both secure and straightforward to set up.
Setting Up SSH on Your Raspberry Pi
Step 1: Enable SSH on Your Raspberry Pi
Before you can remotely access your Raspberry Pi via SSH, you need to ensure that SSH is enabled. Here’s how you can do it:
- Connect your Raspberry Pi to a monitor and keyboard: Initially, you will need to connect your Raspberry Pi to a monitor and keyboard to configure it.
- Access the Raspberry Pi Configuration Tool: Open the terminal from the desktop and type the following command:
sudo raspi-configThis will launch the Raspberry Pi Configuration tool. Navigate to the "Interfaces" tab and select SSH. Choose "Enable" and then exit the configuration tool.
Step 2: Find Your Raspberry Pi’s IP Address
To connect to your Raspberry Pi via SSH, you need to know its IP address. You can find this by typing the following command in the terminal:
- Xxx Is Equal To
- Sophie Rain Spider Man
- Mark Rutte Wife
- Martin Kretz Gescheiden
- Conchita Martinez Is She Married
hostname -IThis will display the IP address of your Raspberry Pi. Make a note of it, as you will need it later to establish an SSH connection.
Step 3: Connect to Your Raspberry Pi via SSH
Once SSH is enabled, you can connect to your Raspberry Pi from another computer on the same network. Here’s how:
- On a Windows PC: Download and install an SSH client such as PuTTY. Enter the Raspberry Pi’s IP address and connect.
- On a Mac or Linux Computer: Open the terminal and type the following command:
ssh pi@Replace `
Accessing Your Raspberry Pi Remotely Over the Internet
While SSH allows you to control your Raspberry Pi from within your local network, you may also want to access it from outside your network. Here are three methods to achieve this:
Method 1: Port Forwarding
Port forwarding allows you to direct traffic from the internet to your Raspberry Pi. To set this up:
- Access your router’s admin panel by entering its IP address in a browser.
- Find the port forwarding settings and create a new rule to forward port 22 (the default SSH port) to the IP address of your Raspberry Pi.
Once port forwarding is configured, you can connect to your Raspberry Pi using its public IP address. Be aware that exposing your Raspberry Pi directly to the internet may pose security risks, so it’s essential to use strong passwords and consider additional security measures like a firewall.
Method 2: Using a VPN
A more secure way to access your Raspberry Pi remotely is by using a Virtual Private Network (VPN). By setting up a VPN, you can create a secure tunnel between your local computer and the Raspberry Pi, protecting your connection from potential threats.
Method 3: Third-Party Services
There are several third-party services that allow you to access your Raspberry Pi remotely without needing to configure port forwarding or a VPN. These services often provide a user-friendly interface and additional features such as file sharing and remote desktop access. Some popular options include ngrok and PageKite.
Advanced Features: Combining SSH with VNC
While SSH provides command-line access to your Raspberry Pi, you may also want to control it using a graphical interface. This can be achieved by pairing SSH with VNC (Virtual Network Computing). VNC allows you to remotely view and interact with the desktop environment of your Raspberry Pi.
To set this up:
- Enable VNC on your Raspberry Pi by navigating to the Raspberry Pi Configuration tool and selecting VNC under the "Interfaces" tab.
- Install a VNC client on your local computer, such as RealVNC Viewer.
- Connect to your Raspberry Pi using its IP address and log in with the appropriate credentials.
With VNC, you can control your Raspberry Pi just as if you were sitting in front of it, making it an ideal solution for tasks that require a graphical interface.
Additional Tips and Tools
Here are a few additional tips and tools to enhance your remote control experience:
- Change the Default Password: Always change the default password of your Raspberry Pi to improve security.
- Use SSH Keys: Instead of relying on passwords, you can set up SSH keys for authentication. This provides an additional layer of security and eliminates the need to enter a password each time you connect.
- Explore Mobile Apps: If you want to control your Raspberry Pi from a mobile device, there are several free apps available on the Google Play Store that support SSH and VNC connections.
Conclusion
In this comprehensive guide, we have explored how to control your Raspberry Pi remotely using SSH. By enabling SSH, connecting to the Raspberry Pi, and managing it remotely, you can unlock the full potential of this powerful microcomputer. Whether you’re accessing it from within your local network or over the internet, SSH provides a secure and reliable method for remote control.
Additionally, combining SSH with VNC allows you to access the graphical interface of your Raspberry Pi, making it even more versatile. With the right tools and knowledge, you can effectively manage your Raspberry Pi from anywhere in the world.
Remember to prioritize security when setting up remote access, especially if you plan to expose your Raspberry Pi to the internet. By following the steps outlined in this guide, you’ll be well-equipped to take full control of your Raspberry Pi and explore its endless possibilities.
- Conchita Mart%C3%ADnez Wife
- Boy Xxx
- Zahn Mcclarnon Wife
- Who Is Conchita Martinez Wife
- Xxl Xxl Xl Pro 2024 T%C3%A9l%C3%A9charger
Raspberry Pi tutorial: Use SSH to in order to remote control your

Remotely Control Your Raspberry Pi Via SSH : 3 Steps - Instructables

How to Control your Raspberry Pi through Windows via SSH - Make Tech Easier
