Unveiling The Majesty: Your Guide To Captivating Whale Drawing
Have you ever gazed upon the vast ocean, dreaming of its majestic inhabitants? The sheer size and grace of whales capture our imaginations, making them a truly inspiring subject for artists. Learning how to draw a whale isn't just a fun activity; it's a journey into understanding form, light, and the subtle beauty of these gentle giants. Whether you're a seasoned artist looking for a new challenge or a beginner eager to dip your toes into the world of marine art, the process of bringing a whale to life on paper is incredibly rewarding.
From the colossal blue whale to the playful humpback, each species offers unique characteristics that make for fascinating artistic exploration. This comprehensive guide will walk you through everything you need to know, from the very first sketch to adding intricate details and vibrant colors, ensuring your whale drawing captures the awe-inspiring presence of these ocean dwellers. Get ready to transform simple lines into a stunning representation of the deep sea's most beloved creatures.
Table of Contents
- Why Draw Whales? The Allure of Ocean Giants
- Essential Art Supplies for Your Whale Drawing Journey
- Getting Started: The Basic Shapes of a Whale Drawing
- Step-by-Step Guide: From Outline to Detail in Whale Drawing
- Bringing Your Whale to Life: Eyes, Mouth, and Tail
- Advanced Techniques: Shading, Layering, and Color in Realistic Whale Drawing
- Making Your Whale Drawing Unique: Cartoon vs. Realistic Styles
- The Therapeutic Benefits of Whale Drawing and Creative Expression
Why Draw Whales? The Allure of Ocean Giants
My fascination with whales began the first time I saw one. Their sheer scale and the quiet power with which they moved through the water left an indelible mark on my memory. Since then, I've had a profound connection to these gentle giants of the ocean. Wanting to capture their beauty, I started drawing whales. At first, all I could manage were simple shapes, but even those basic sketches filled me with joy. Gradually, my skills improved, and I learned to add details like the texture of their skin, the subtle curves of their bodies, and the distinct features that make each species unique. This personal journey highlights a universal truth: learning how to draw a whale is a fun activity that also teaches us how to work with refining basic shapes into unique structures.
The appeal of whale drawing extends beyond mere artistic endeavor; it's a way to connect with nature and appreciate the incredible diversity of life on our planet. Whales, with their iconic silhouettes and often mysterious lives, offer endless inspiration. From the sleek lines of an orca to the barnacle-encrusted head of a humpback, each whale presents a new artistic challenge and opportunity for expression. The process encourages observation, patience, and a deeper understanding of anatomy and form. It's an accessible subject too; many find that whales are easy to draw once you grasp a few fundamental principles, making them a great starting point for aspiring artists of all ages.
The Joy of Simple Shapes to Unique Structures
One of the most encouraging aspects of whale drawing is how approachable it is. You don't need to be an expert to start; the process often begins with simple geometric forms. Think of a large oval for the body, a triangle for the tail, and smaller ovals for the head. It's about building up complexity from simplicity. This approach not only makes the task less daunting but also reinforces fundamental drawing skills that are transferable to any subject. As you progress, you'll learn to sculpt these basic shapes into the distinctive contours of a whale, adding the nuances that make your drawing truly come alive. This transformation from basic forms to unique, recognizable structures is incredibly satisfying and is a core lesson in artistic development.
Essential Art Supplies for Your Whale Drawing Journey
Before you embark on your whale drawing adventure, gathering the right art supplies is crucial. While you don't need an elaborate studio setup, having a few key items will significantly enhance your experience and the quality of your artwork. Remember, this is a list of the supplies we often use, but feel free to use whatever you have on hand or what you're most comfortable with. The most important thing is to start creating!
- Pencils: A range of graphite pencils (e.g., HB for sketching, 2B-4B for darker lines and shading). Mechanical pencils can also be great for fine details.
- Paper: Choose a good quality drawing paper. Heavier paper (around 90-100lb or 180-200 gsm) is ideal as it can withstand erasing and layering without tearing or buckling.
- Erasers: A kneaded eraser is excellent for lifting graphite gently without smudging, and a vinyl eraser (like a Staedtler Mars Plastic) is good for precise clean-ups.
- Blending Tools: Tortillons (blending stumps) or cotton swabs can help create smooth transitions in your shading.
- Optional Coloring Mediums:
- Colored Pencils: For adding subtle color and detail.
- Watercolor Paints: For a more fluid, ethereal look.
- Acrylic or Oil Paints: If you want to create your own realistic whale drawing with teal, navy, black, and white paints, these are excellent choices for vibrant, opaque colors and texture.
- Reference Images: High-quality photos of whales are invaluable. You can find inspiration and reference 66,568 whale drawing photos for download online, or simply observe documentaries and nature programs.
Having these tools ready will set you up for success. Don't feel pressured to buy everything at once; start with the basics and expand your collection as you discover what works best for your personal style and preferred techniques. The joy of creating is not in the tools themselves, but in how you use them to express your vision.
Getting Started: The Basic Shapes of a Whale Drawing
The process of drawing a whale is broken up into a few simple steps, making it accessible even for those new to art. We will start with a light general sketch, where we form the animal in its basic shapes to capture its form. This initial stage is crucial as it lays the foundation for your entire drawing. Think of it as building the skeleton before adding the muscles and skin. Using light, loose lines allows for easy corrections and adjustments without leaving heavy indentations on your paper.
Begin by observing the overall shape of the whale you wish to draw. Most whales have a torpedo-like body, wider in the middle and tapering towards the head and tail. Start with a large, elongated oval or a gentle, curved "C" shape for the main body. This will serve as the central mass of your whale. Don't press too hard with your pencil; these are just guidelines that you'll refine later. This foundational step is where you establish the proportion and posture of your whale, ensuring it looks balanced and natural before you dive into the finer details. Remember, the goal here is to capture the essence of the whale's form, not perfection.
Mastering the Torso and Jaw Lines
Once you have the basic body shape, it's time to define the major sections, starting with the torso and jaw. Depict the upper outline of the torso with a smooth curved line, similar to the initial body shape but more defined. Then, depict the lower part of the torso, creating the belly. This extensive, curved line on the bottom of the body, starting from the lower jaw and extending towards the back for the belly, is vital for giving your whale its characteristic streamlined appearance.
For the jaw, begin by using long curved lines to outline the whale's lower jaw. Use one line for the top of the jaw, another for the bottom. Whales often have very distinct jawlines, especially filter feeders like baleen whales. Pay attention to how the jaw connects to the main body and how it tapers towards the front. A short line at the corner of the mouth can also help define the transition from the jaw to the rest of the head. This careful attention to these initial lines will ensure your whale drawing has a strong, anatomically sound base.
Step-by-Step Guide: From Outline to Detail in Whale Drawing
With the basic shapes and major outlines in place, we can now move into adding the defining features that make your whale recognizable. This is where your whale drawing starts to truly take shape, transforming from a simple sketch into a dynamic representation. Each step builds upon the last, gradually adding complexity and realism. Remember, patience is key, and it's perfectly fine to erase and redraw until you're happy with the results.
A typical whale drawing can take anywhere from 25 minutes for a blue whale to 30 minutes for a more detailed rendering, but don't rush the process. Enjoy the journey of creation. Begin by refining the overall contours of the whale's body. Smooth out any jagged lines and ensure the curves flow naturally. Think about the specific species you are drawing – a humpback whale will have a more robust body than a sleek killer whale, for instance. These subtle variations are what give your drawing character and authenticity. Pay close attention to the transition points, such as where the head meets the body and where the body tapers towards the tail.
Adding the Pectoral Fin and Belly
Next, it's time to add the whale's pectoral fin. In this step-by-step guide on how to draw a whale, draw a curved line on the side of the body to create the whale’s pectoral fin. The shape and size of the pectoral fin vary significantly between species. Humpback whales, for example, are known for their exceptionally long pectoral fins, which can be nearly a third of their body length. Orcas have much shorter, more rounded fins. Observe your reference image carefully to get the correct proportion and curvature for the fin you're depicting. The fin should emerge smoothly from the body, indicating its natural attachment point.
Simultaneously, revisit the belly line. You've already drawn an extensive, curved line on the bottom of the body, starting from the lower jaw and extending towards the back for the belly. Now, you can refine this line, adding subtle undulations or creases that suggest the flexibility of the whale's underside. For baleen whales, you might even hint at the pleats or grooves that expand when they feed. This attention to detail, even in seemingly minor elements, significantly enhances the realism and depth of your whale drawing.
Bringing Your Whale to Life: Eyes, Mouth, and Tail
Once the main body and fins are established, focusing on the smaller, yet crucial, details will truly bring your whale drawing to life. These elements — the eyes, mouth, and tail — are vital for conveying expression, movement, and the unique characteristics of your chosen whale species. While they might seem minor compared to the vastness of the whale's body, their accurate depiction can make all the difference.
Whale eyes are relatively small, nestled beside the huge mouth. This can be a challenge, as their small size can make them easy to overlook or draw disproportionately. Observe where the eye sits in relation to the jawline and the overall head shape. Often, it's positioned slightly above and behind the corner of the mouth. For a realistic look, draw a small circle or almond shape, and then add a smaller, shaded circle within it for the pupil. The surrounding skin might have subtle folds or wrinkles, adding to the realism. For a cartoon beluga whale outline, you might begin by drawing a wavy curved line for the front of the mouth, and near the end of the line, draw a circle within a circle and shade between them, forming the whale's eye, giving it a more expressive, simplified look.
The mouth, especially for baleen whales, is a prominent feature. You've already outlined the lower jaw. Now, you can refine the mouth line, adding a short line at the corner of the mouth to give it definition. For toothed whales like orcas, the mouth will be a more defined, often straight line, perhaps with a hint of a smile or a determined set. The tail, or fluke, is another key identifier. The left end should taper into a small curve, forming the whale’s tail base. From this base, the two lobes of the fluke extend outwards, forming a powerful, graceful shape. The curve and angle of the fluke can convey motion and power, so consider whether your whale is swimming, diving, or breaching when you draw it. Each of these details contributes significantly to the overall impact and authenticity of your whale drawing.
Advanced Techniques: Shading, Layering, and Color in Realistic Whale Drawing
Once you've mastered the basic outlines and features, you can elevate your whale drawing by incorporating advanced techniques like line work, shading, and colors through a layering process. This approach helps to build up a more realistic representation of a blue whale or any other species, adding depth, volume, and a sense of three-dimensionality to your artwork. This lesson is a bit more advanced, but still a lot of fun for everyone, as it allows for greater artistic expression and a deeper understanding of light and form.
Shading is paramount for creating realism. Think about the light source in your drawing. Where is the light coming from, and how does it hit the whale's curved body? Areas facing the light will be brighter, while areas away from it will be darker. Use varying pencil pressures or different grades of graphite pencils to create a range of tones. Cross-hatching, stippling, and smooth blending are all effective shading techniques. For a truly realistic whale drawing, pay attention to the subtle shifts in value that define the whale's muscular structure and the way its skin reflects light underwater. This meticulous application of shade gives your whale drawing a tangible presence.
Exploring Different Whale Species: Humpbacks, Orcas, and Blue Whales
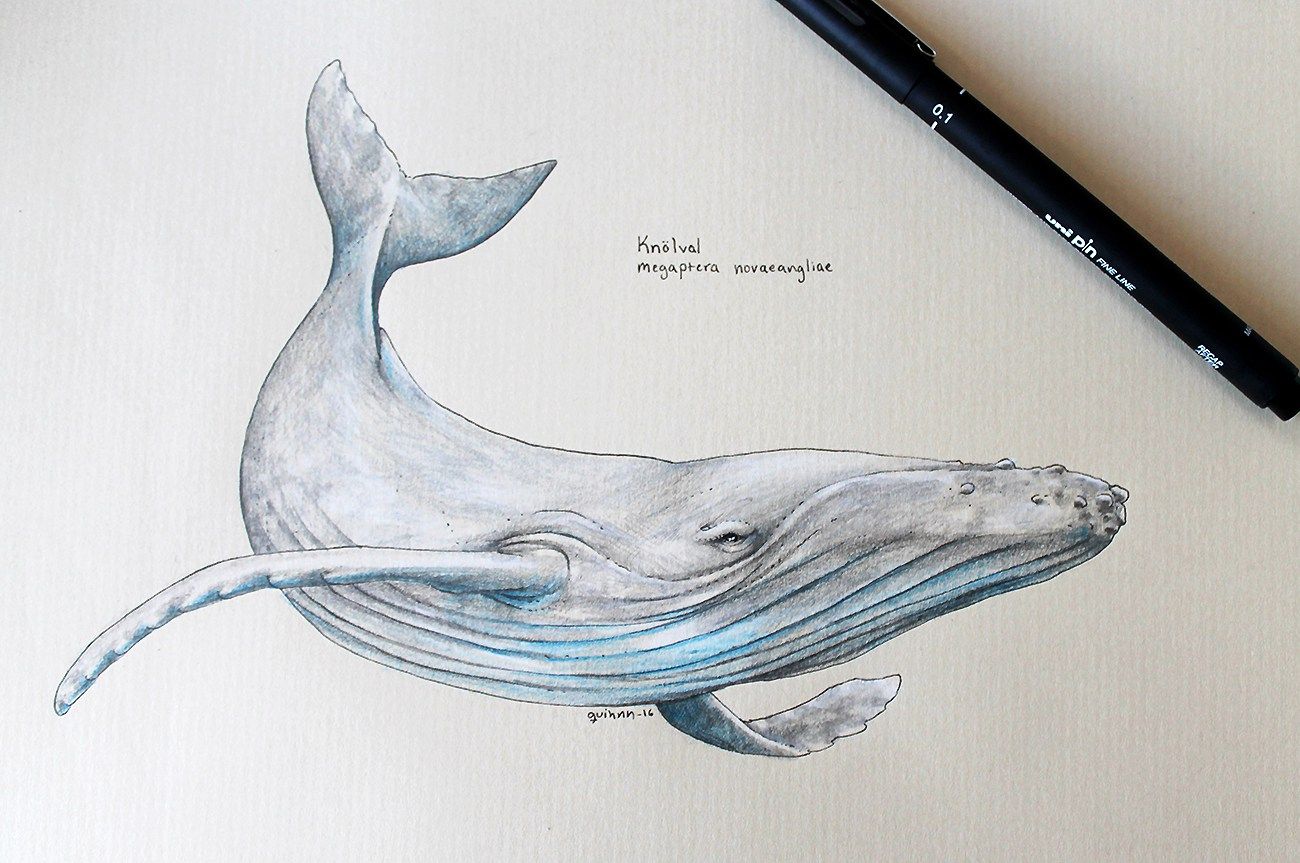
The world of whales is incredibly diverse, and exploring different species can add immense variety and challenge to your whale drawing practice. Today, Hadley and I are learning how to draw a humpback whale, known for its distinctive long pectoral fins and knobbly head. Humpbacks offer unique textures and poses, especially when breaching or tail-slapping. Their bodies often show signs of barnacles and scars, which can be fascinating details to incorporate.
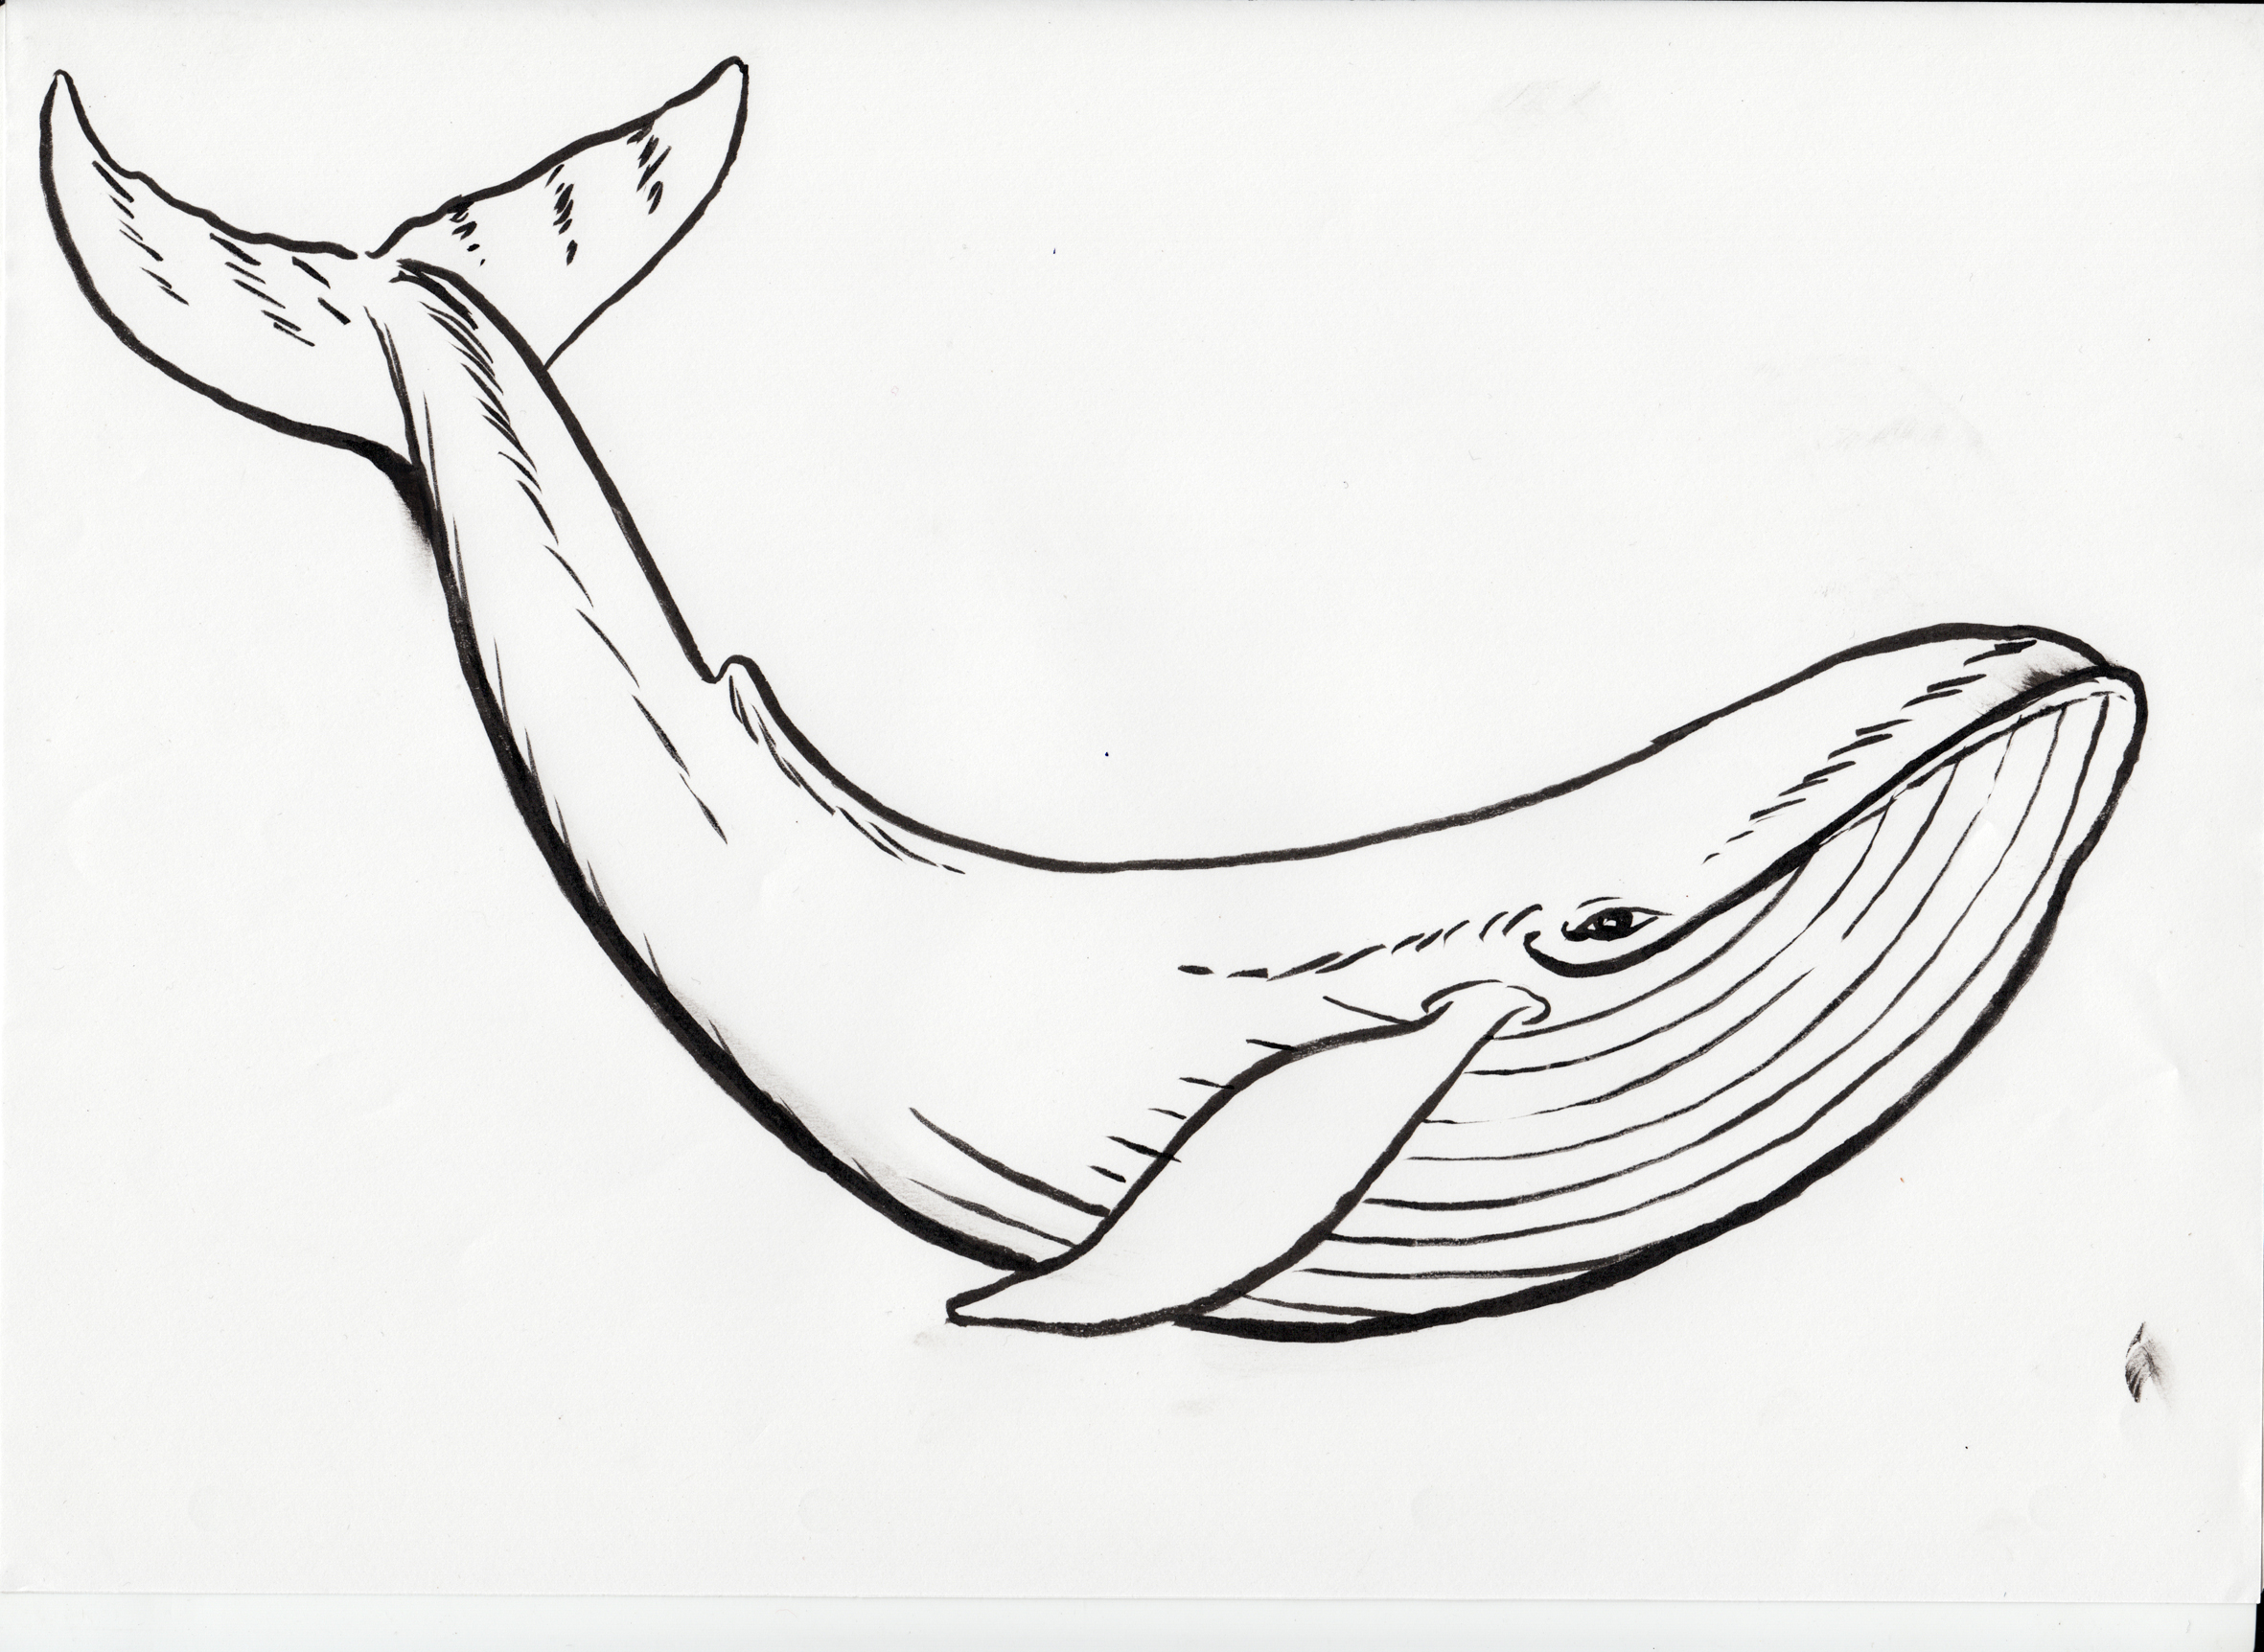
Alternatively, consider learning how to draw a killer whale or an orca. Orcas have a sleek, powerful build with striking black and white markings. Their dorsal fins are tall and straight, unlike the smaller, more curved fins of many other whales. Depicting the sharp contrast between their black and white patches requires careful attention to clean lines and precise shading. And of course, the magnificent blue whale, the largest animal on Earth, presents its own set of challenges with its immense, streamlined body and subtle blue-gray coloration. Each species demands a unique approach to capture its essence, making your whale drawing journey endlessly fascinating.
Making Your Whale Drawing Unique: Cartoon vs. Realistic Styles
The beauty of whale drawing lies in its versatility. You're not confined to a single style; you can choose to create a highly detailed, realistic portrayal or opt for a whimsical, stylized cartoon. Both approaches offer unique joys and challenges, allowing you to express your artistic vision in different ways. Whether you're a fan of sea creatures in general or have a specific whale in mind, adapting your style can make your artwork truly stand out.
If you're aiming for realism, as discussed in the advanced techniques section, the focus will be on accurate anatomy, subtle shading, and true-to-life colors. Create your own realistic whale drawing with teal, navy, black, and white paints to capture the deep ocean hues and the whale's natural coloration. This involves meticulous observation of reference photos, understanding light and shadow, and layering colors to achieve depth and texture. The goal is to make the viewer feel as if they are looking at a photograph, or even a living creature, on your paper. This style often appeals to those who appreciate precision and the beauty of natural forms.
On the other hand, if you want to learn how to draw a funny whale, or a more charming, simplified version, a cartoon style is perfect. This approach allows for exaggeration, simplified lines, and vibrant, often non-realistic, colors. You can give your whale expressive eyes, a wide grin, or even add accessories like a tiny hat. Begin the cartoon beluga whale outline by drawing a wavy curved line for the front of the mouth, then near the end of the line, draw a circle within a circle and shade between them, forming the whale's eye – a classic cartoon technique. Cartoon whale drawings are fantastic for storytelling, creating greeting cards, or simply bringing a smile to someone's face. They are often easier for beginners, as they forgive minor inaccuracies and encourage creative freedom. The choice between realistic and cartoon styles ultimately depends on your personal preference and the message you wish to convey with your whale drawing.
The Therapeutic Benefits of Whale Drawing and Creative Expression
Beyond the artistic skill development, engaging in whale drawing offers a wealth of therapeutic benefits. The act of creating art is widely recognized for its positive impact on mental well-being, and focusing on such magnificent creatures as whales can be particularly calming and inspiring. It's been fun this week drawing ocean creatures, and we hope you've had fun with us, because the process itself is a form of mindfulness, allowing you to immerse yourself fully in the present moment.
Drawing, especially subjects like whales that evoke a sense of wonder and tranquility, can reduce stress, improve focus, and boost self-esteem. As you concentrate on the curves of the body, the subtle shading, and the intricate details, your mind shifts away from daily worries. This focused attention can lead to a meditative state, promoting relaxation and mental clarity. The satisfaction of seeing your whale drawing come to life, from a blank page to a finished piece, provides a profound sense of accomplishment and reinforces your creative capabilities. It’s a gentle reminder that whales are easy to draw, and that artistic growth is a journey, not a destination.
Furthermore, sharing your artwork can foster a sense of community and connection. It's Friday, so be sure to post all of your art to social media or share it with friends and family! Seeing others appreciate your whale drawing can be incredibly validating and inspiring. Platforms like Pinterest are great for finding and saving ideas about whale drawing, and also for sharing your own creations. The act of drawing, whether for personal enjoyment or public display, is a powerful form of self-expression that enriches your life and connects you to the broader world of art and nature. Learning more about the easy whale drawing process can unlock not just artistic skill, but also a deeper sense of peace and creative fulfillment.
Conclusion
From the first tentative sketch to the final stroke of color, the journey of whale drawing is an incredibly rewarding experience. We've explored how starting with simple shapes can lead to complex, beautiful representations, how essential art supplies can aid your creative process, and the step-by-step techniques for bringing these ocean giants to life on paper. We've also delved into advanced methods like shading and layering, and the joy of depicting various species from the majestic humpback to the powerful orca, and even how to learn how to draw a funny whale. Ultimately, this artistic endeavor is more than just putting pencil to paper; it's a meditative practice that connects us to the natural world and enhances our well-being.
Whether you aim for a realistic masterpiece or a charming cartoon, your whale drawing will be a testament to your creativity and fascination with these incredible creatures. Don't be afraid to experiment, make mistakes, and most importantly, have fun with the process. The world of art is vast and welcoming, and your unique perspective is a valuable addition. So grab your supplies, find some inspiration, and start drawing! We encourage you to share your whale drawing creations with us in the comments below, or perhaps join our monthly membership and download our app for more exclusive tutorials and a supportive community. Your next masterpiece is waiting to be created!
- Conchita Martinez Partner
- Aagmal
- Raspberry Pi Batch Job Over Internet Remote Work From Home
- Adriana Lima Top Fell
- Mafia Boss Necati Arabaci
Humpback Whale Drawing at PaintingValley.com | Explore collection of

Blue Whale Drawing - HelloArtsy
Whale Line Drawing at GetDrawings | Free download
